Story
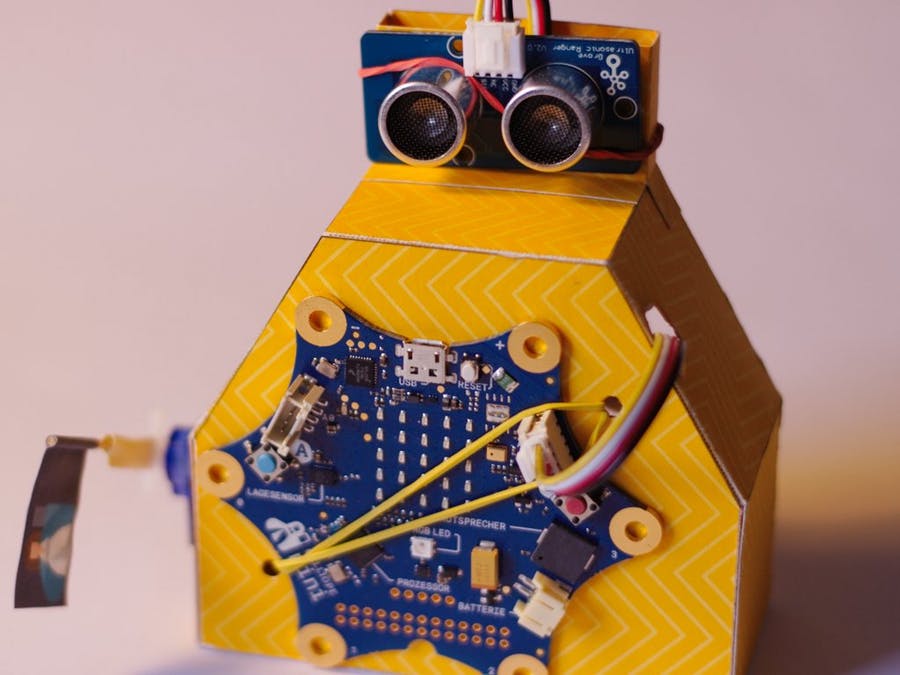
In this project I'll describe the construction of a waving robot. When you approach the robot (more precisely the ultrasonic distance sensor that looks like its "eyes") at a fixed distance, a servo begins to move back and forth - the robot waves. It is controlled by a Calliope mini.
The robot is constructed in three phases:
1. crafting of the case
2. equipping it with electronic components
3. programming the Calliope Mini
Crafting of the case
For the case you need a DinA4 (21,00 x 29,70 cm) cardboard, which should be as thick as possible and at the same time thin enough to be printed in the printer. I used a cardboard with 300g/qm, which worked well. It will be printed with the following template (PDF in the appendices):

The pattern must be cut out along the length of the solid lines. The inner surfaces can easily be cut out with a scalpel. If not at hand, scissors can also be used.
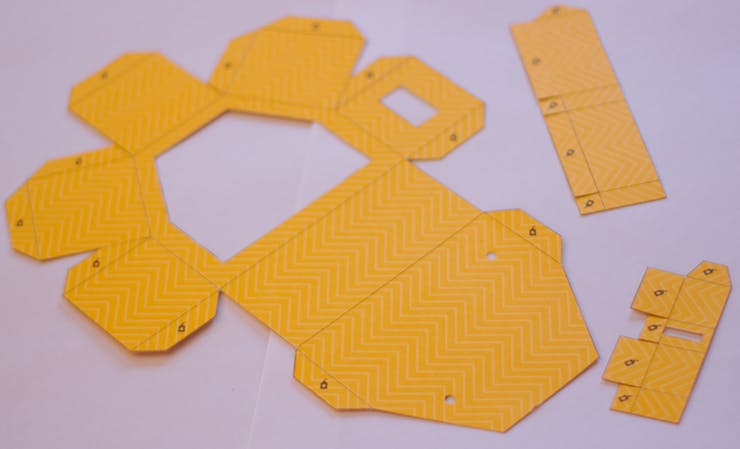
Fold along the dotted lines. This can be done by scoring the cardboard with the tip of the scissors along the lines with the help of a ruler. The two small circles in the case must be punched out. The easiest way to do this is with a punch plier. If this is not at hand, it should also fold with a pointed object. The holes must be large enough so that a rubber band can be pulled through. The areas marked with a small adhesive bottle symbol are the adhesive areas.
Attention: the servo mount (top right) is designed for the exact dimensions of the servo. In my case this is the "Tower Pro Micro Servo 9G, SG 90". You can get it e. g. at eBay or Alibaba. If you use another servo with different dimensions, then you have to adjust the cutting template.
After cutting out, first glue the two small pieces together in a ring.
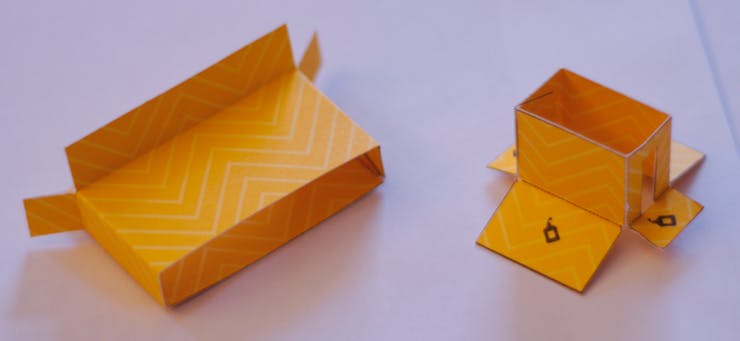
Then glue the holder for the servo (in the template top right) into the housing. The slot in the holder points upwards. The servo holder must be inside later.
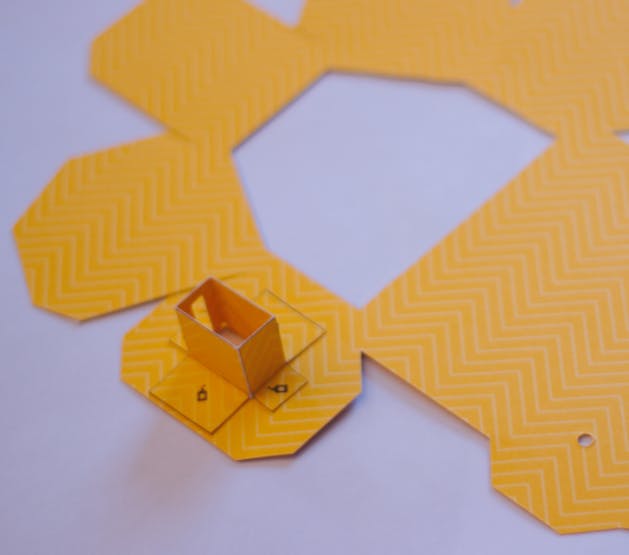
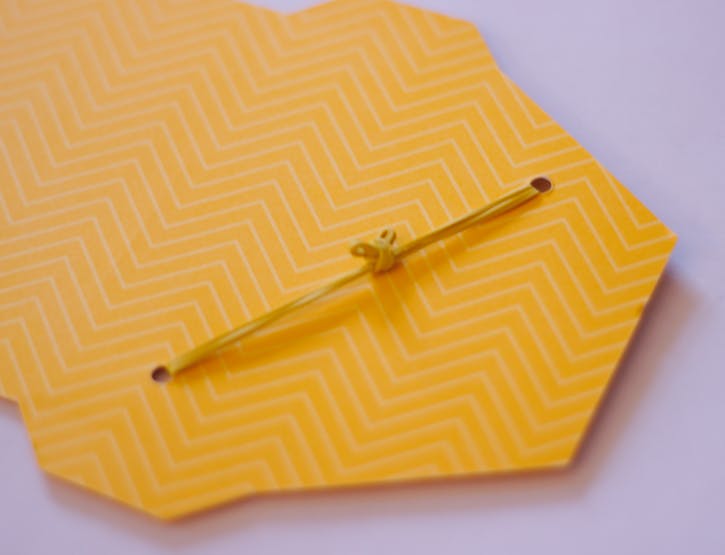
Now a rubber band is strapped through the two holes. This is supposed to hold the Calliope mini later.
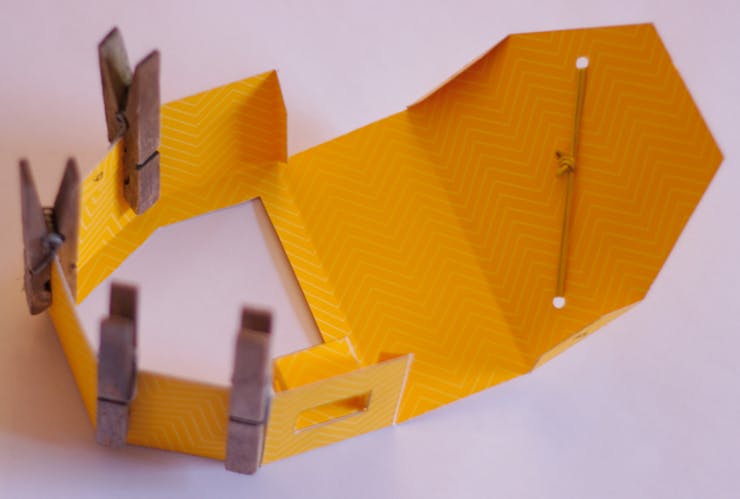
In my experience, the easiest way to do this is to first glue the tabs on the side panels and then the tabs on the front. Clothes pegs are suitable for holding the adhesive connection.
Finally, glue the holder for the ultrasonic sensor (in the template above left) flush to the back of the housing on top.
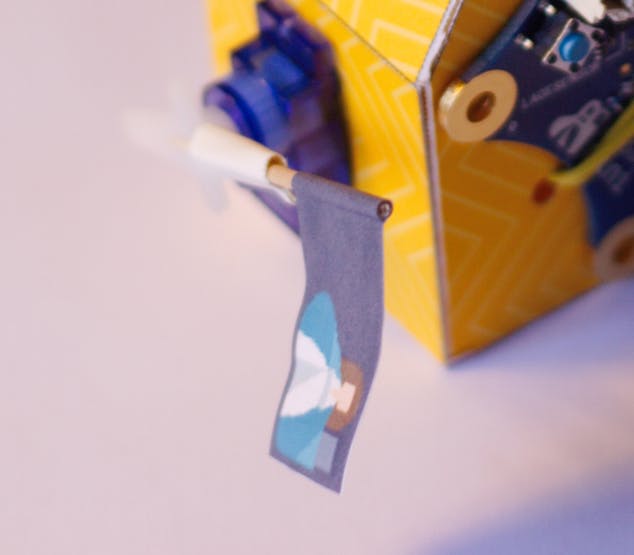
The last step is the construction of the waving arm. For this I converted a toothpick into a flagpole. The flag is a piece of paper with an approximated size of 3 cm x 2 cm. If you print it with a motive, you have to put the picture twice next to each other (about 6 cm x 2 cm) and glue it around the toothpick. The toothpick is then glued to the attachment, which is part of the servo, with some tape. This whole arm is put on the servo.
Equipping everything with the electronic components
Now it's time to install the electronics.
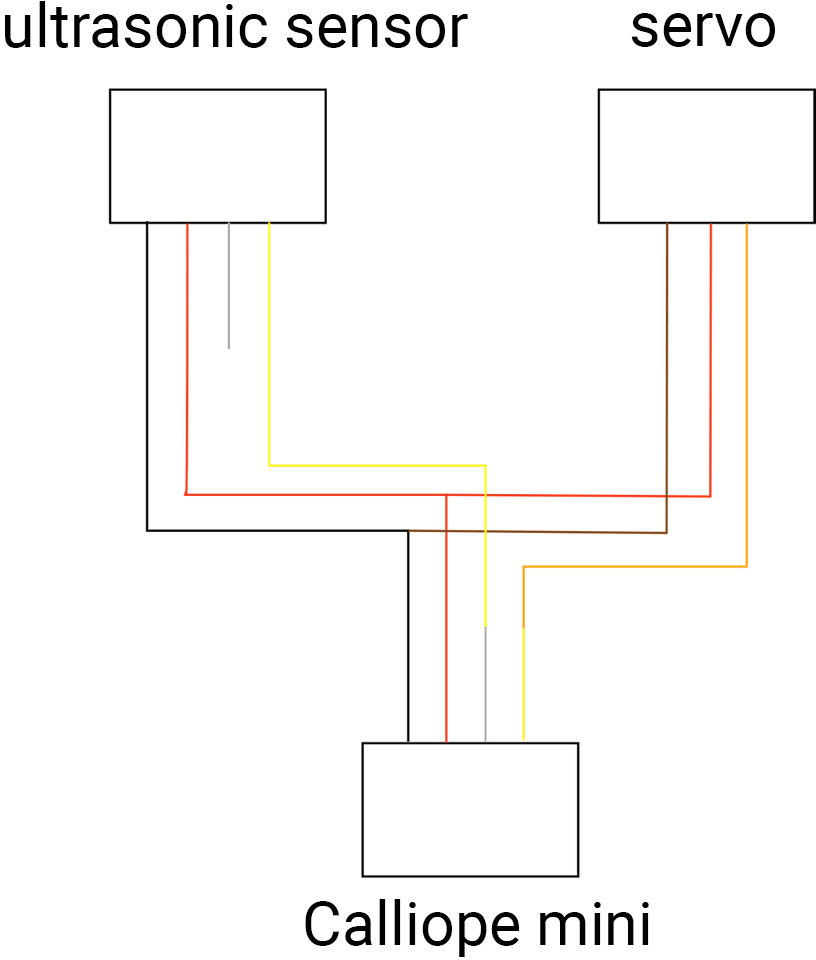
First you have to make a special cable, with which you can connect the servo as well as the ultrasonic sensor to the Calliope mini. Both components can actually be connected via a grove connector. The Calliope also has two sockets for grove plugs, but only one of the two can handle analog signals. The grove connection has four lines: supply voltage, ground and two data lines. The servo and the ultrasonic sensor can share the first two lines and then each get a data line. So I cut the grove cable that comes with the ultrasound sensor in the middle. If you now look at the Grove plug, which is plugged into the Calliope mini, we get the following assignment: the white cable of the plug goes to the data cable of the ultrasonic distance sensor (yellow) and the yellow cable goes to the data cable of the servo (orange cable of the servo). The servo is then connected to pin C16 on the Calliope mini, the ultrasonic distance sensor to pin C17. The three red ends (of the connector, sensor and servo) are connected as well as the three earth ends (of the connector black, sensor black and servo brown). It is best to solder the connections and secure them with shrink tubing.
Attention: mount the shrink tubing before connecting! If you don't have a soldering iron at hand, you can simply twist the ends and glue an adhesive tape around them.
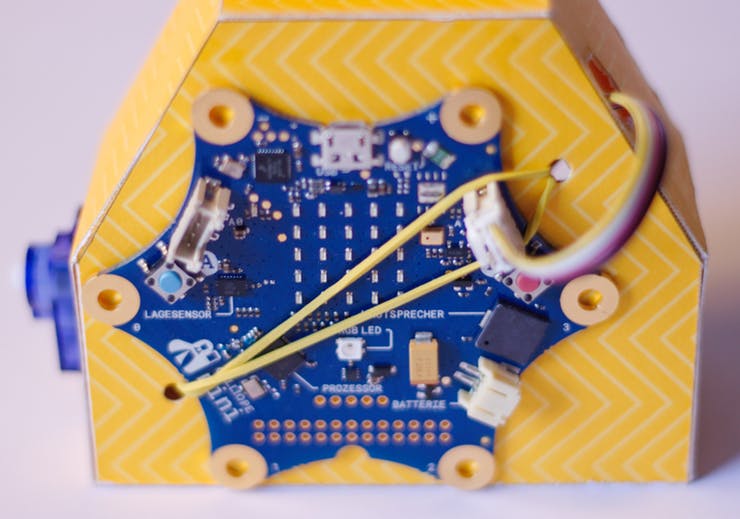
The Calliope mini is simply stretched on the front behind the rubber.
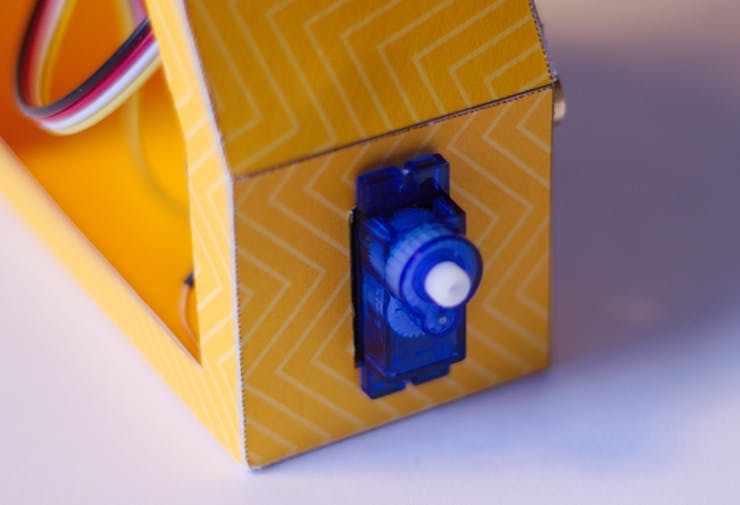
The installation of the servo is a bit fiddly. First you have to insert the cable from the outside through the hole in the servo mount and then carefully insert the servo as well. The cable disappears in the recess of the servo mount.
The ultrasonic distance sensor is attached with another rubber band to the corresponding holder on top of the housing. It is important to use SeeedStudio version 2.0 with this sensor because it can handle 3.3V (and not only 5V).
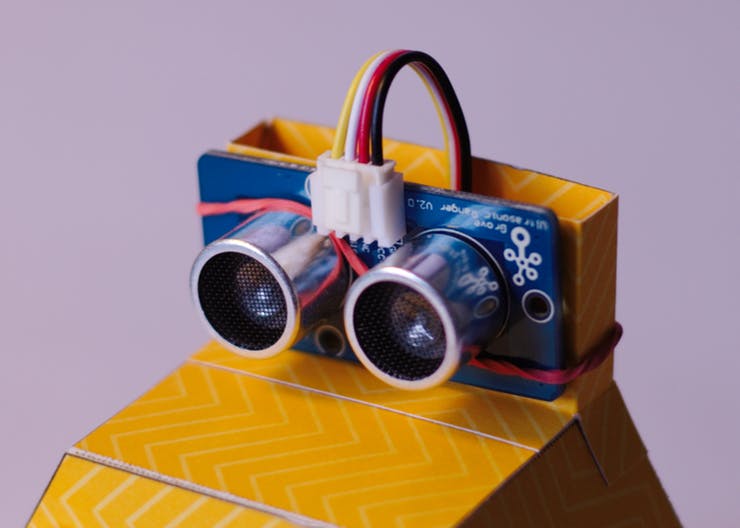
Now you only have to plug the two remaining ends of the cable with the Grove plugs to the Calliope Mini (Slot B) and to the sensor. Attention: The plug, where all four wires are occupied, goes into the Calliope, the plug, where the white wire is not used, goes into the sensor.
Programming the Calliope mini
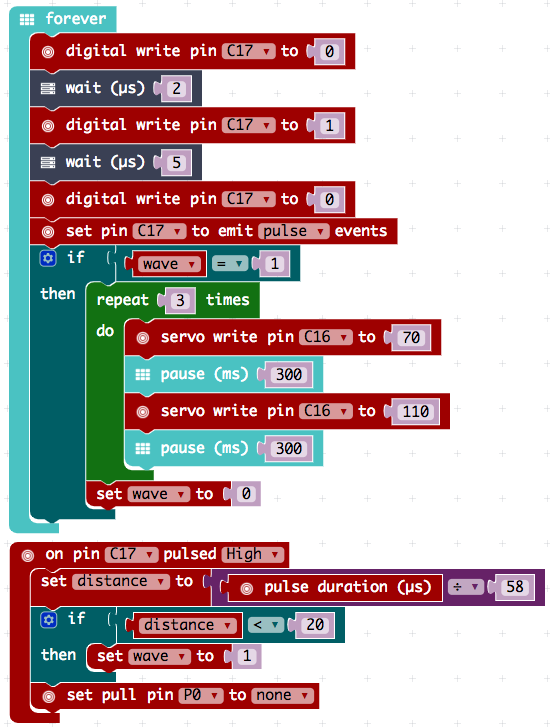
With the Calliope Mini you now have to address the ultrasonic distance sensor and the servo. For reading the distance value from the sensor there is already an instruction here: see thisLink by Boris Crismancich. Together with the comments below the article you get the two code blocks below.
To explain: To query the value on the distance sensor, first send the digital pattern 0-1-0. Then wait for the response ("emit pulse event"). The second block has the task of collecting this pulse signal and measuring its duration. The duration must still be converted into a distance in centimeters (division by 58) and compared with a threshold value (here 20 cm). If the measured distance is smaller than the threshold value, the variable wave is converted from 0 to 1. This variable is used in the first block, if it has the value 1, as the starting signal for waving. To do this, the servo moves three times from 70 to 110 degrees and back again. After the waving has ended, the wink variable is reset to 0.