First steps: Creepy Pumpkin
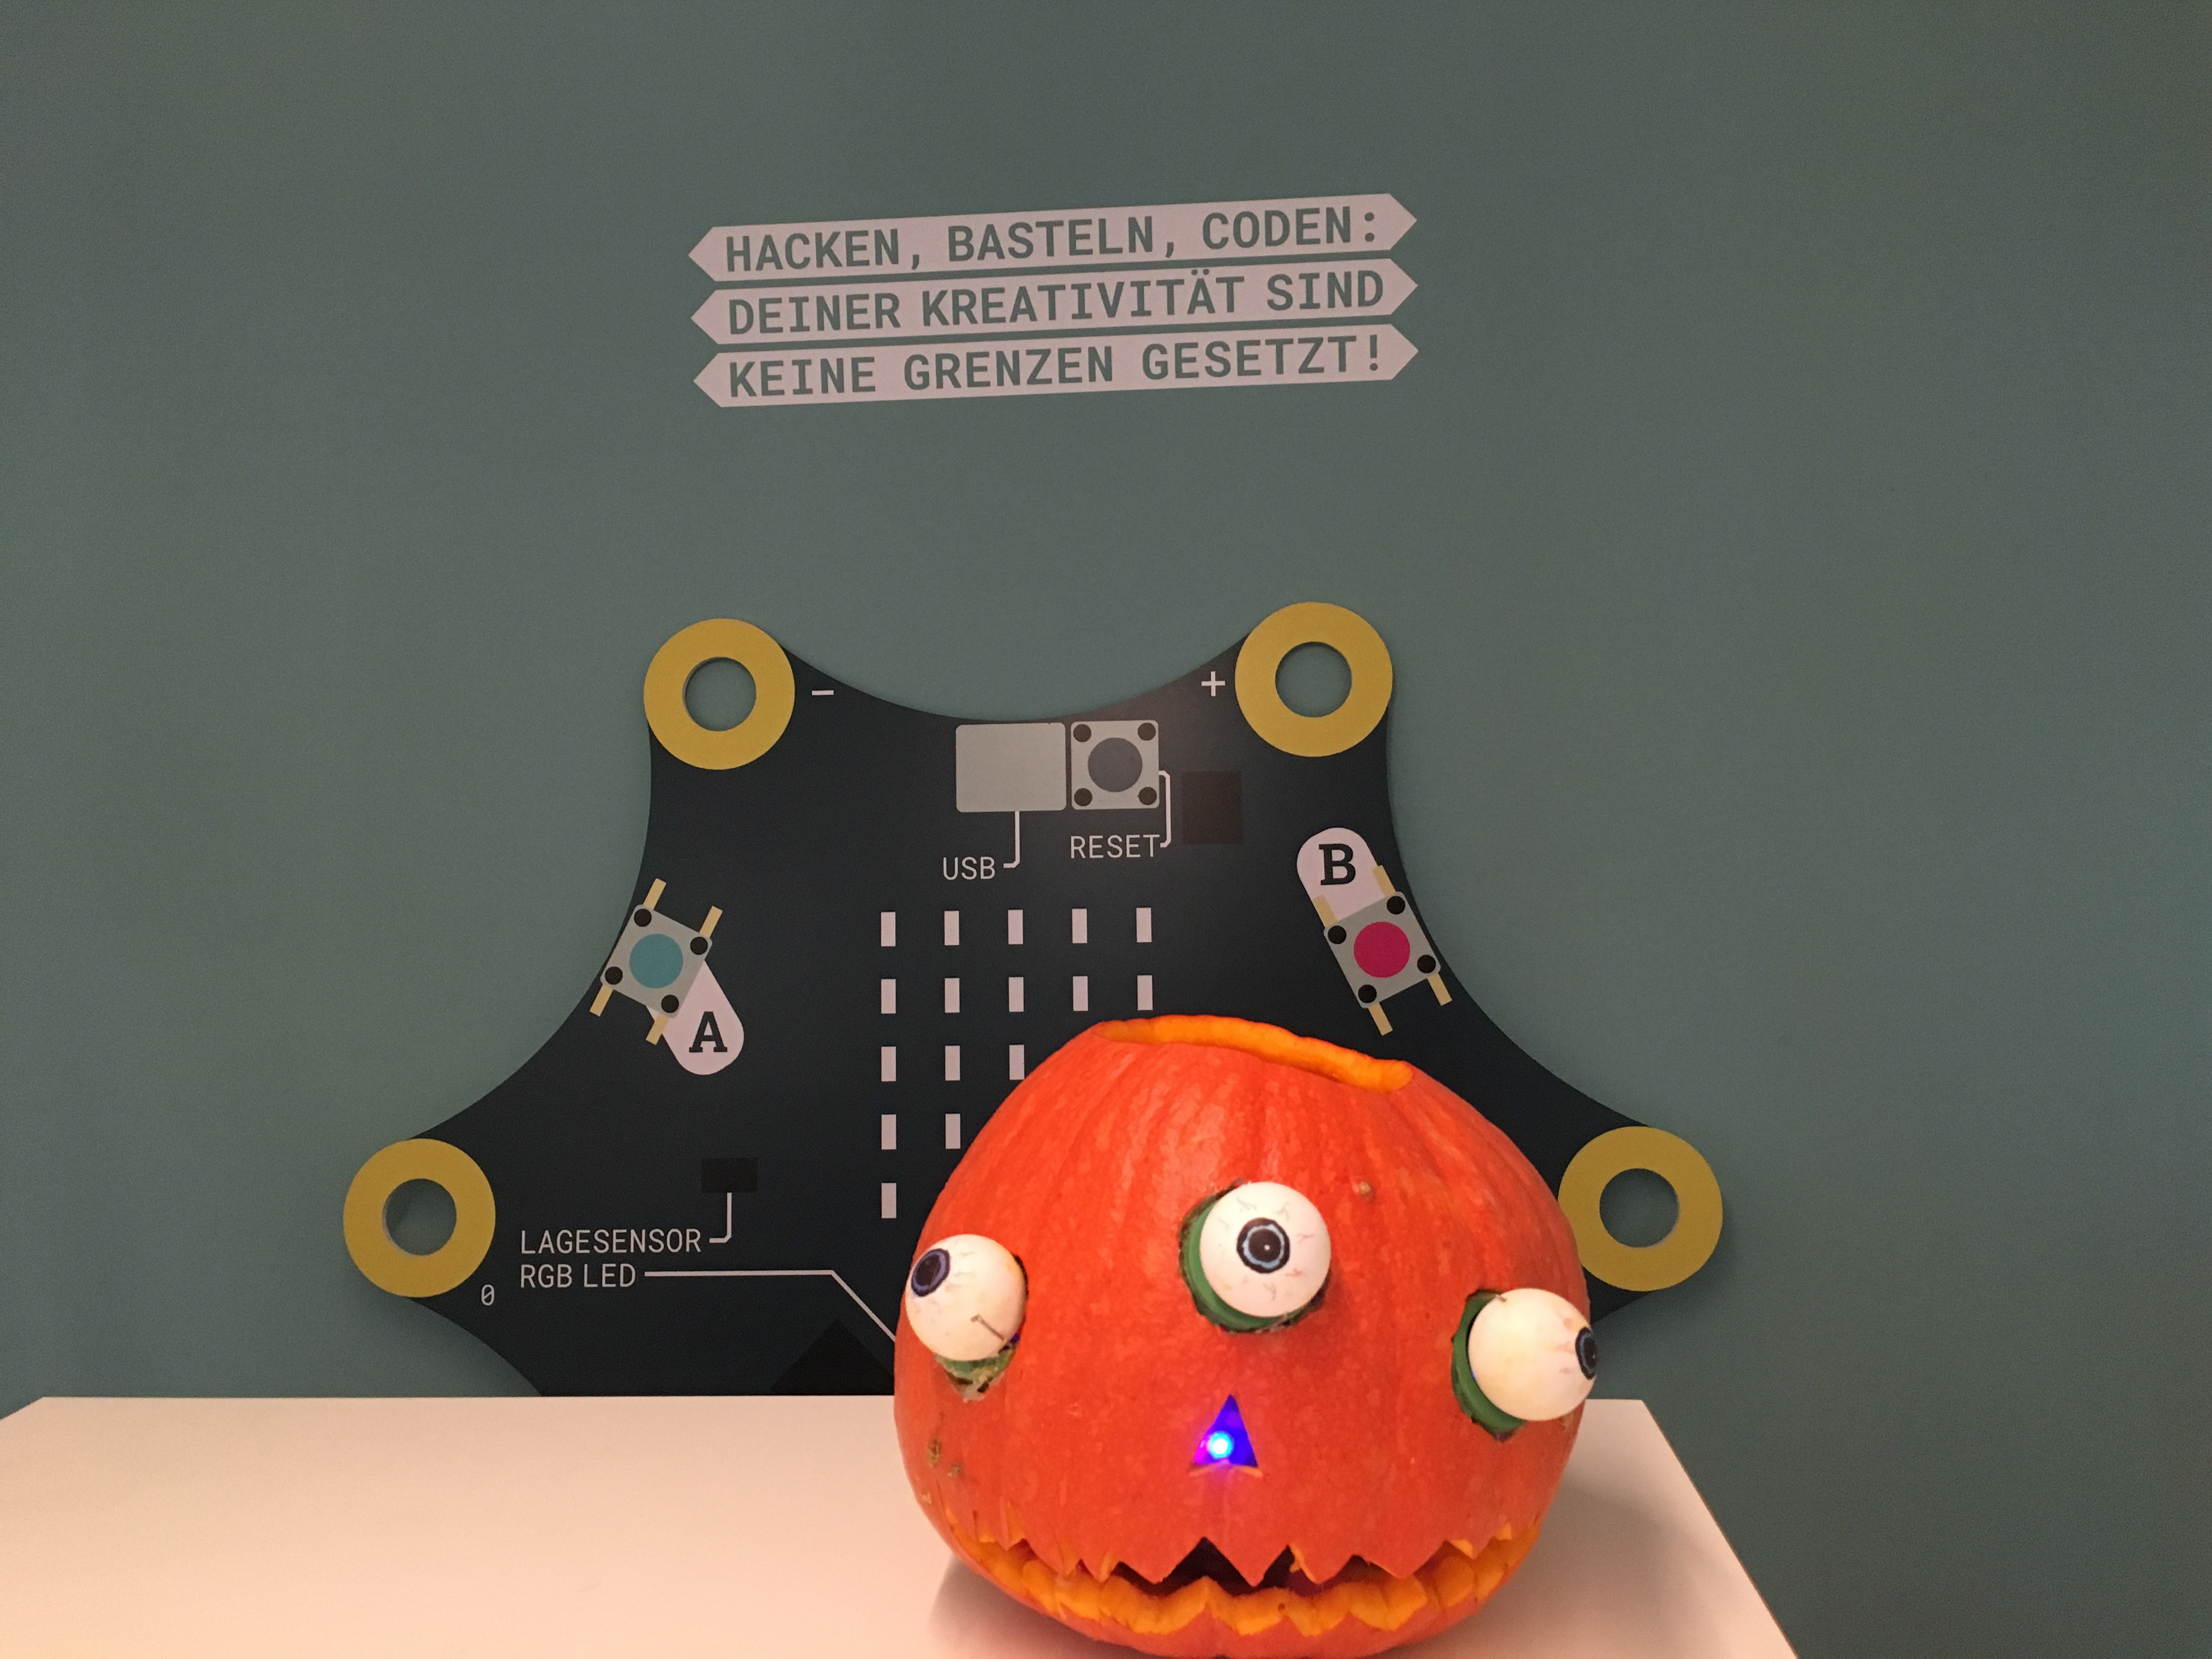
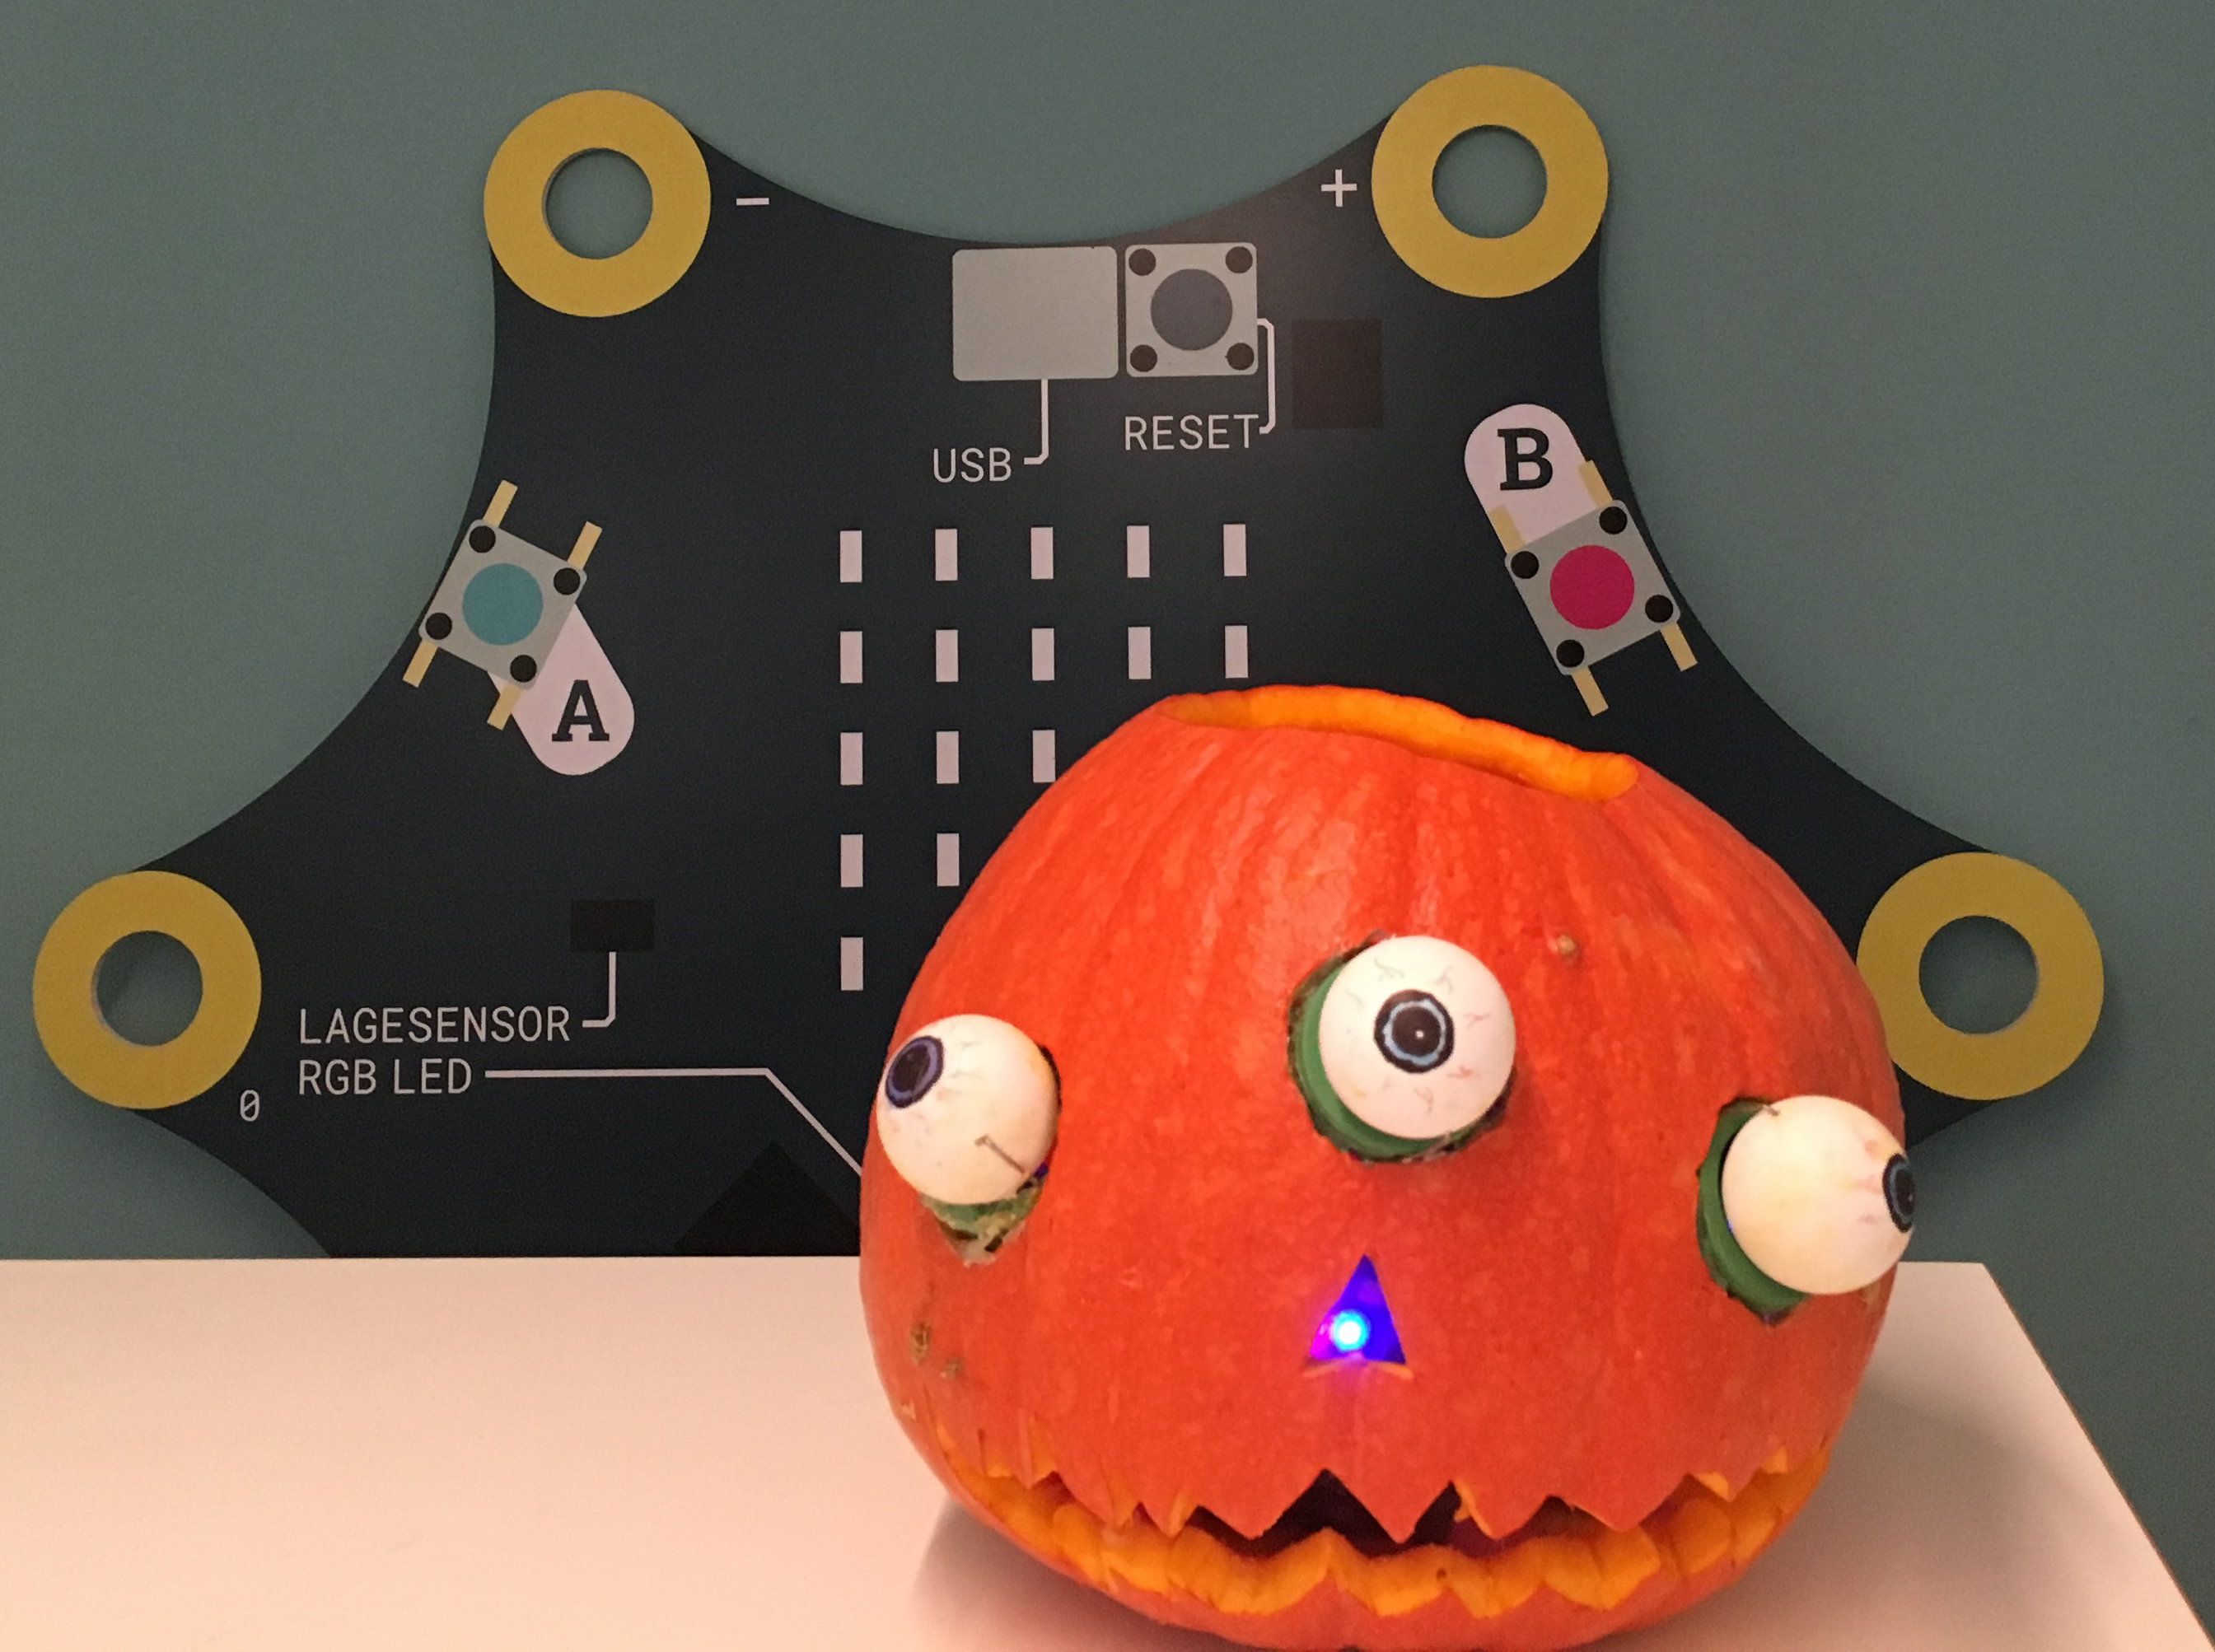
With the help of Calliope mini you can bring your pumpkin to life and give it moving eyes. You can find out how to do this here.
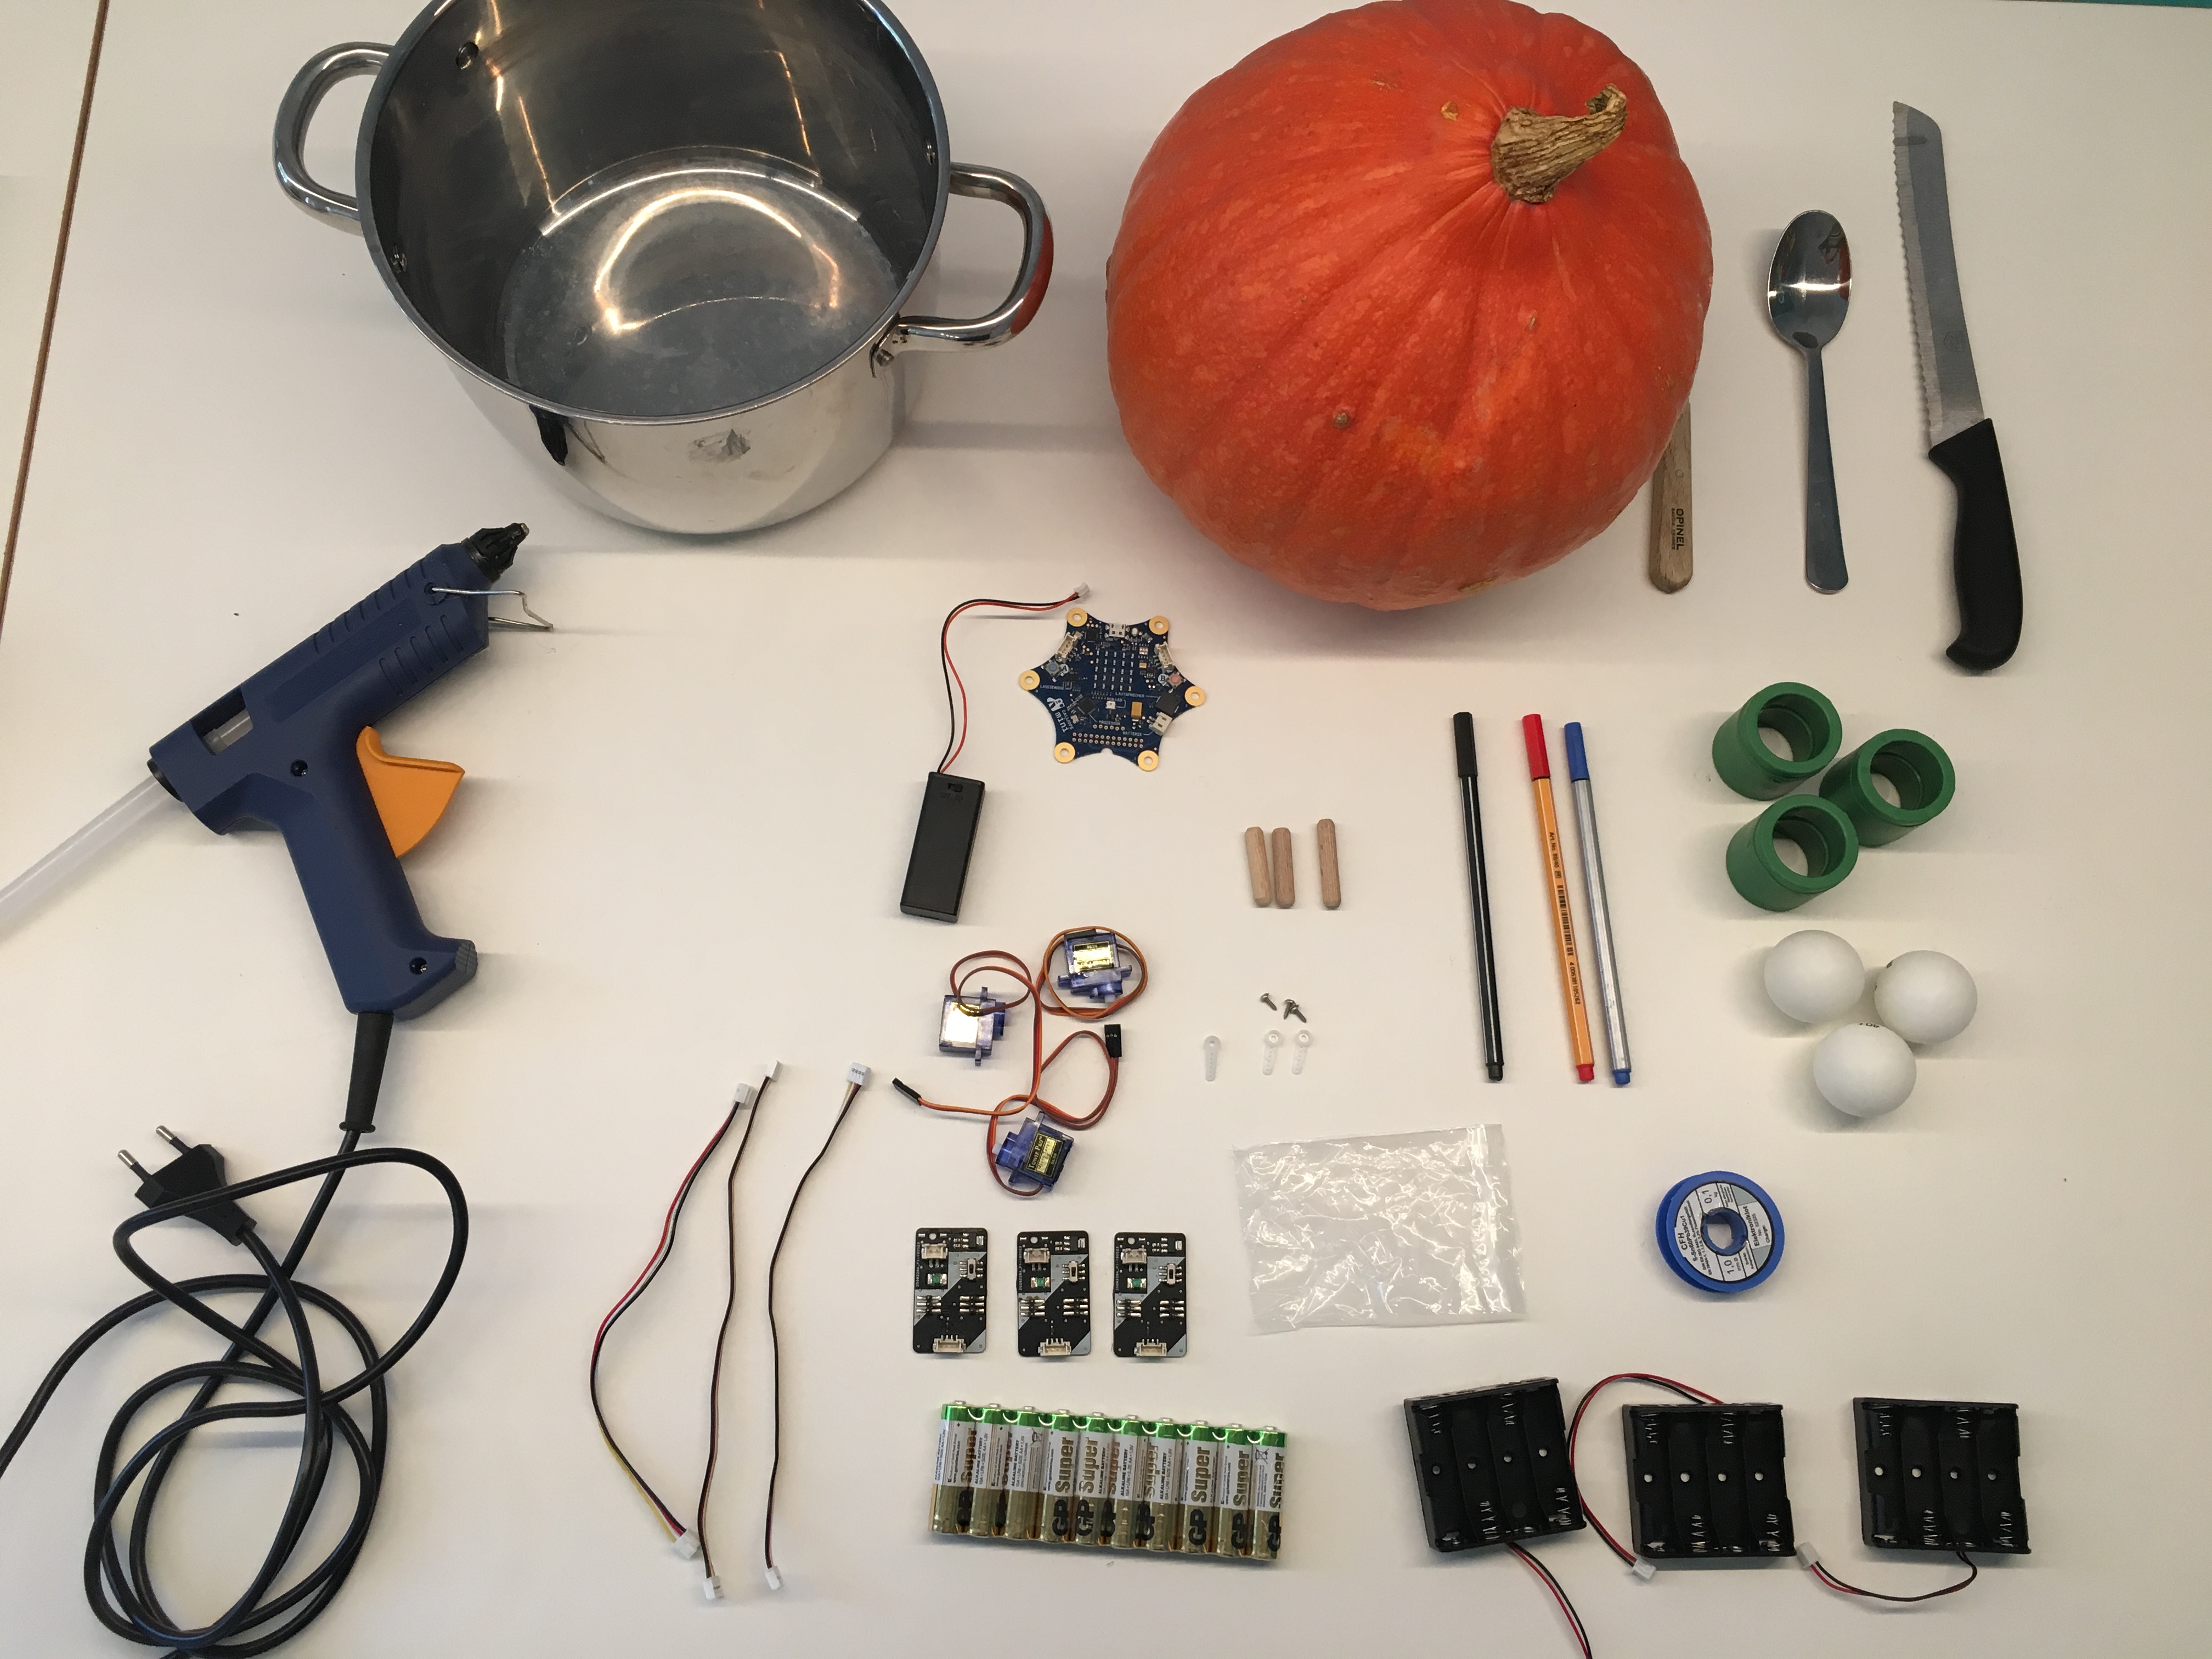
Accessories for a pumpkin with three eyes: 3x table tennis balls, wire, dowels, 3x PVC tubes (4 cm x 3 cm), fineliner, 3x calliope minis, 3x MotionKit Servo Boards, USB cable, 3x4 AA batteries, 3x battery holder for 4 batteries, 3x Grove cable, 3x small plastic bags, big bowl
Tool: hot glue gun, sharp knife, spoon
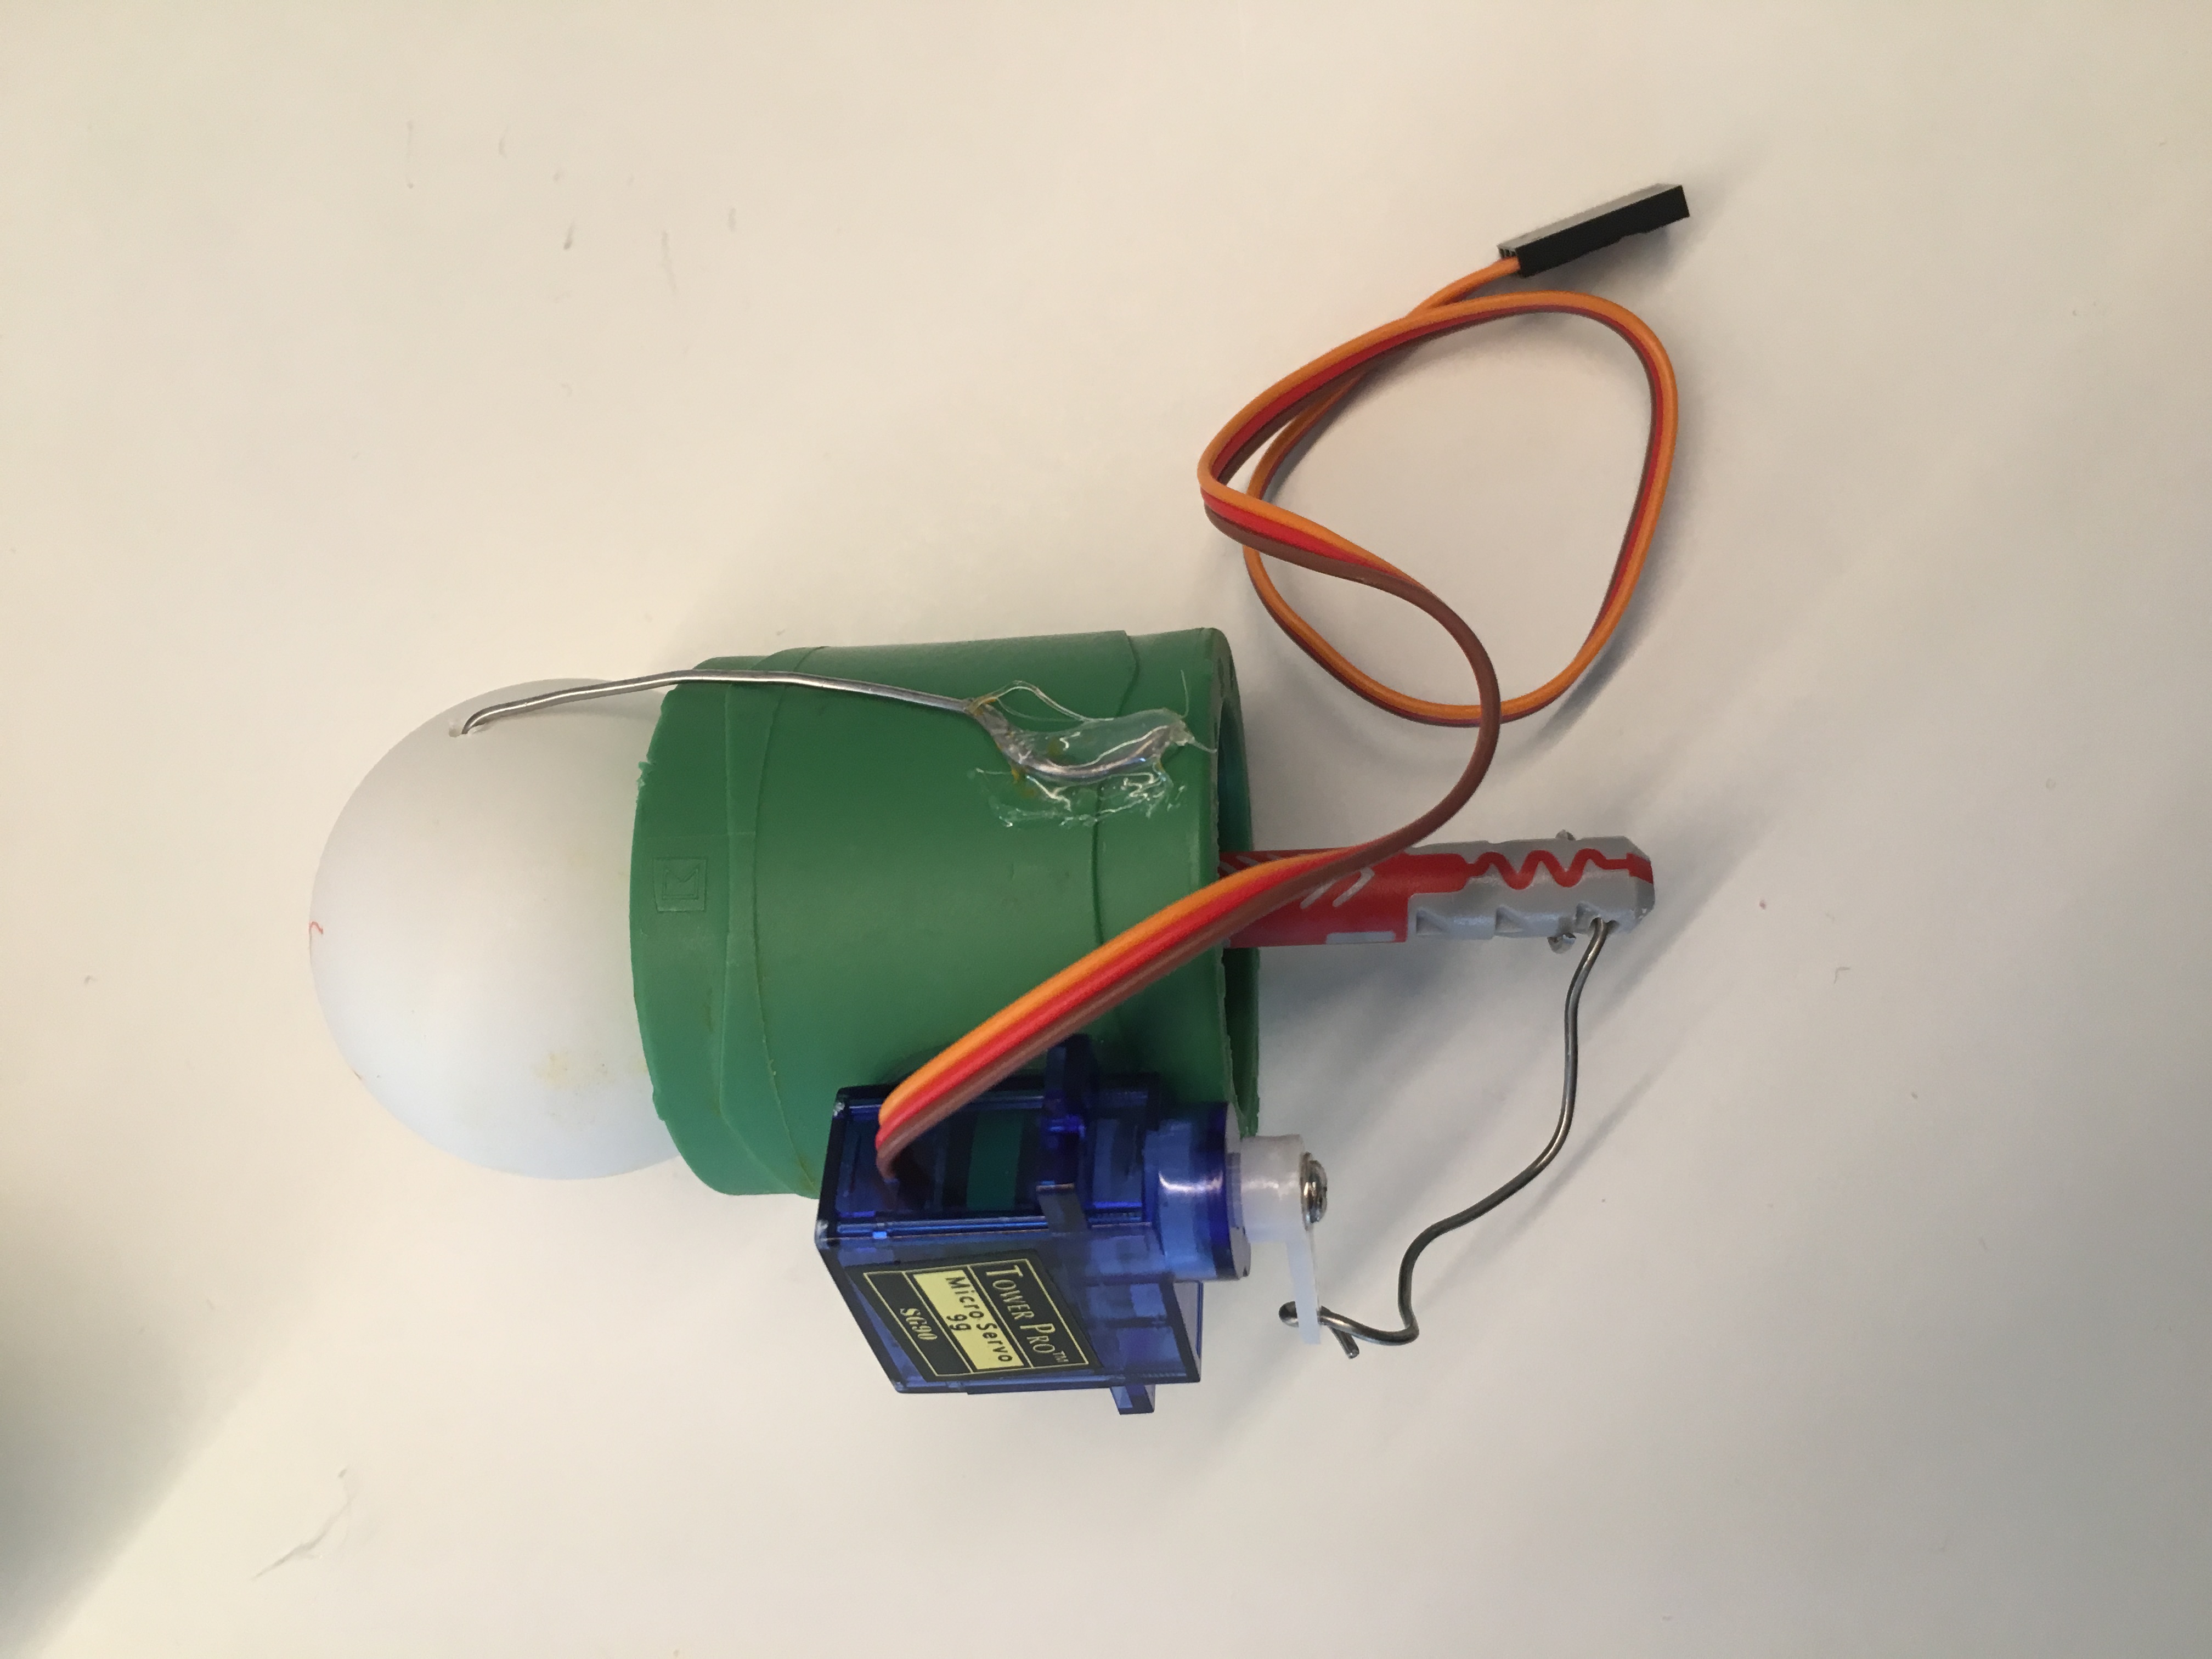
The first step is to craft the movable eyes. Either the white table tennis balls have to be painted with eyes, or small eye balls are bought directly from the handicraft shop. A hole must be drilled on each side of the eye. Make sure that the holes are opposite each other so that a wire can be pushed through them afterwards. The wire should be long enough so that the ends protrude at least 3 cm on both sides of the table tennis ball.
Tip: Use a wire that is not too soft so that it does not bend too much.
Then prepare the couplings and dowels. These should be cut so that the couplings are 4 cm wide and the dowels are 4 cm long. The eyeball is then attached to the tubes by gluing the ends of the wire to the tube with hot glue.
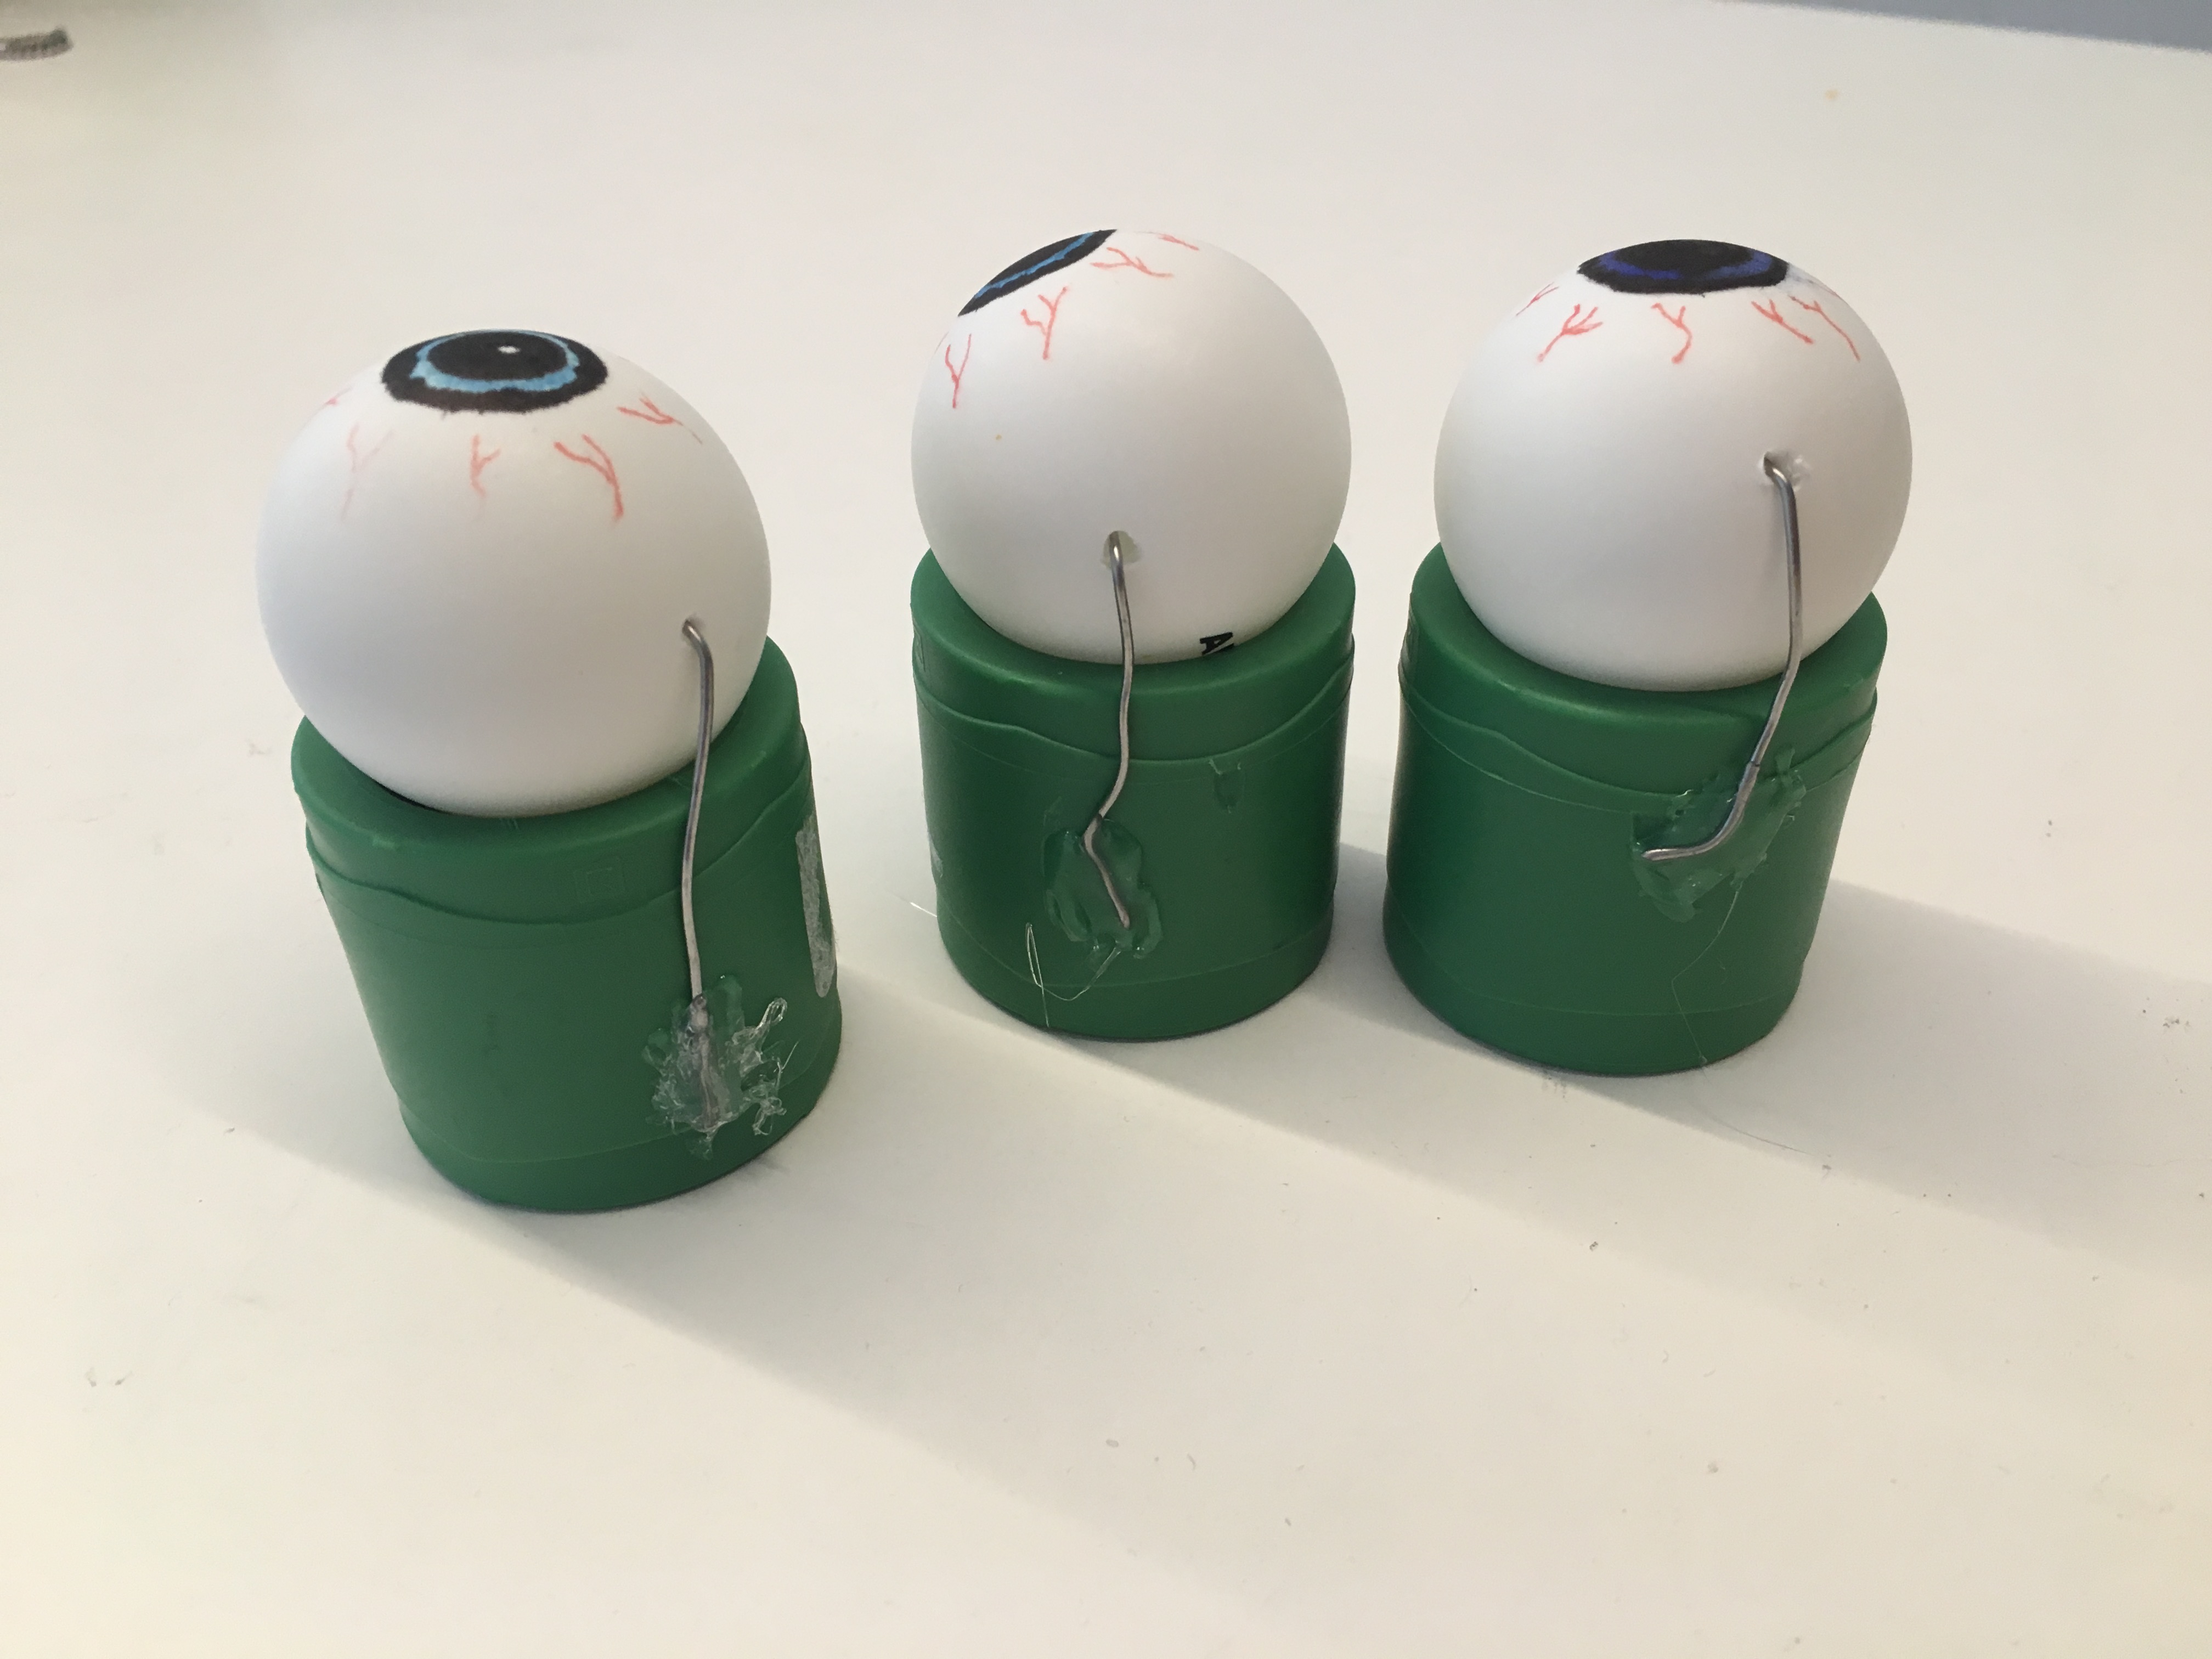
After the eyeballs have been attached to the tubes and made to rotate freely, the dowels are prepared. A hole is drilled through the plug at one end to allow a piece of wire to pass through. The other end of the plug is inserted through the tubes and glued to the rear end of the eyeball.
Insert one end of the wire through the hole in the plug. The other is attached to the servomotor. The servo motors are then glued to the pipes with hot glue.
Before you install the eyes in the pumpkin, you should test whether they move properly. Therefore you connect the servo motors with the MotionKit Servo Board. We need a higher power supply for the commissioning of the motors. Therefore an extra power source is connected to each board (4 AA, 6V). So for each eye you need a servo motor, a MotionKit Servo Board, a Calliope mini and an extra power source. The minis are connected to the boards via Grove cables.
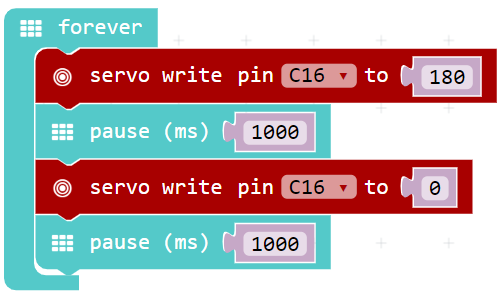
The servos are controlled via pin C16 on the MotionKit Servo Board. The control code could look like this:
You can play around with the values.
Finally, you can prepare the pumpkin. First the pumpkin is hollowed out and as many holes carved into the pumpkin as eyes were prepared. The holes must be as large as the eyeballs are wide.
Tip: Before you cut out the holes, it is a good idea to draw the holes on the pumpkin. This will make sure that the holes are the right size.
Put the eyeballs through the holes from the inside and fix them with hot glue. If this does not hold, you can also use screws.
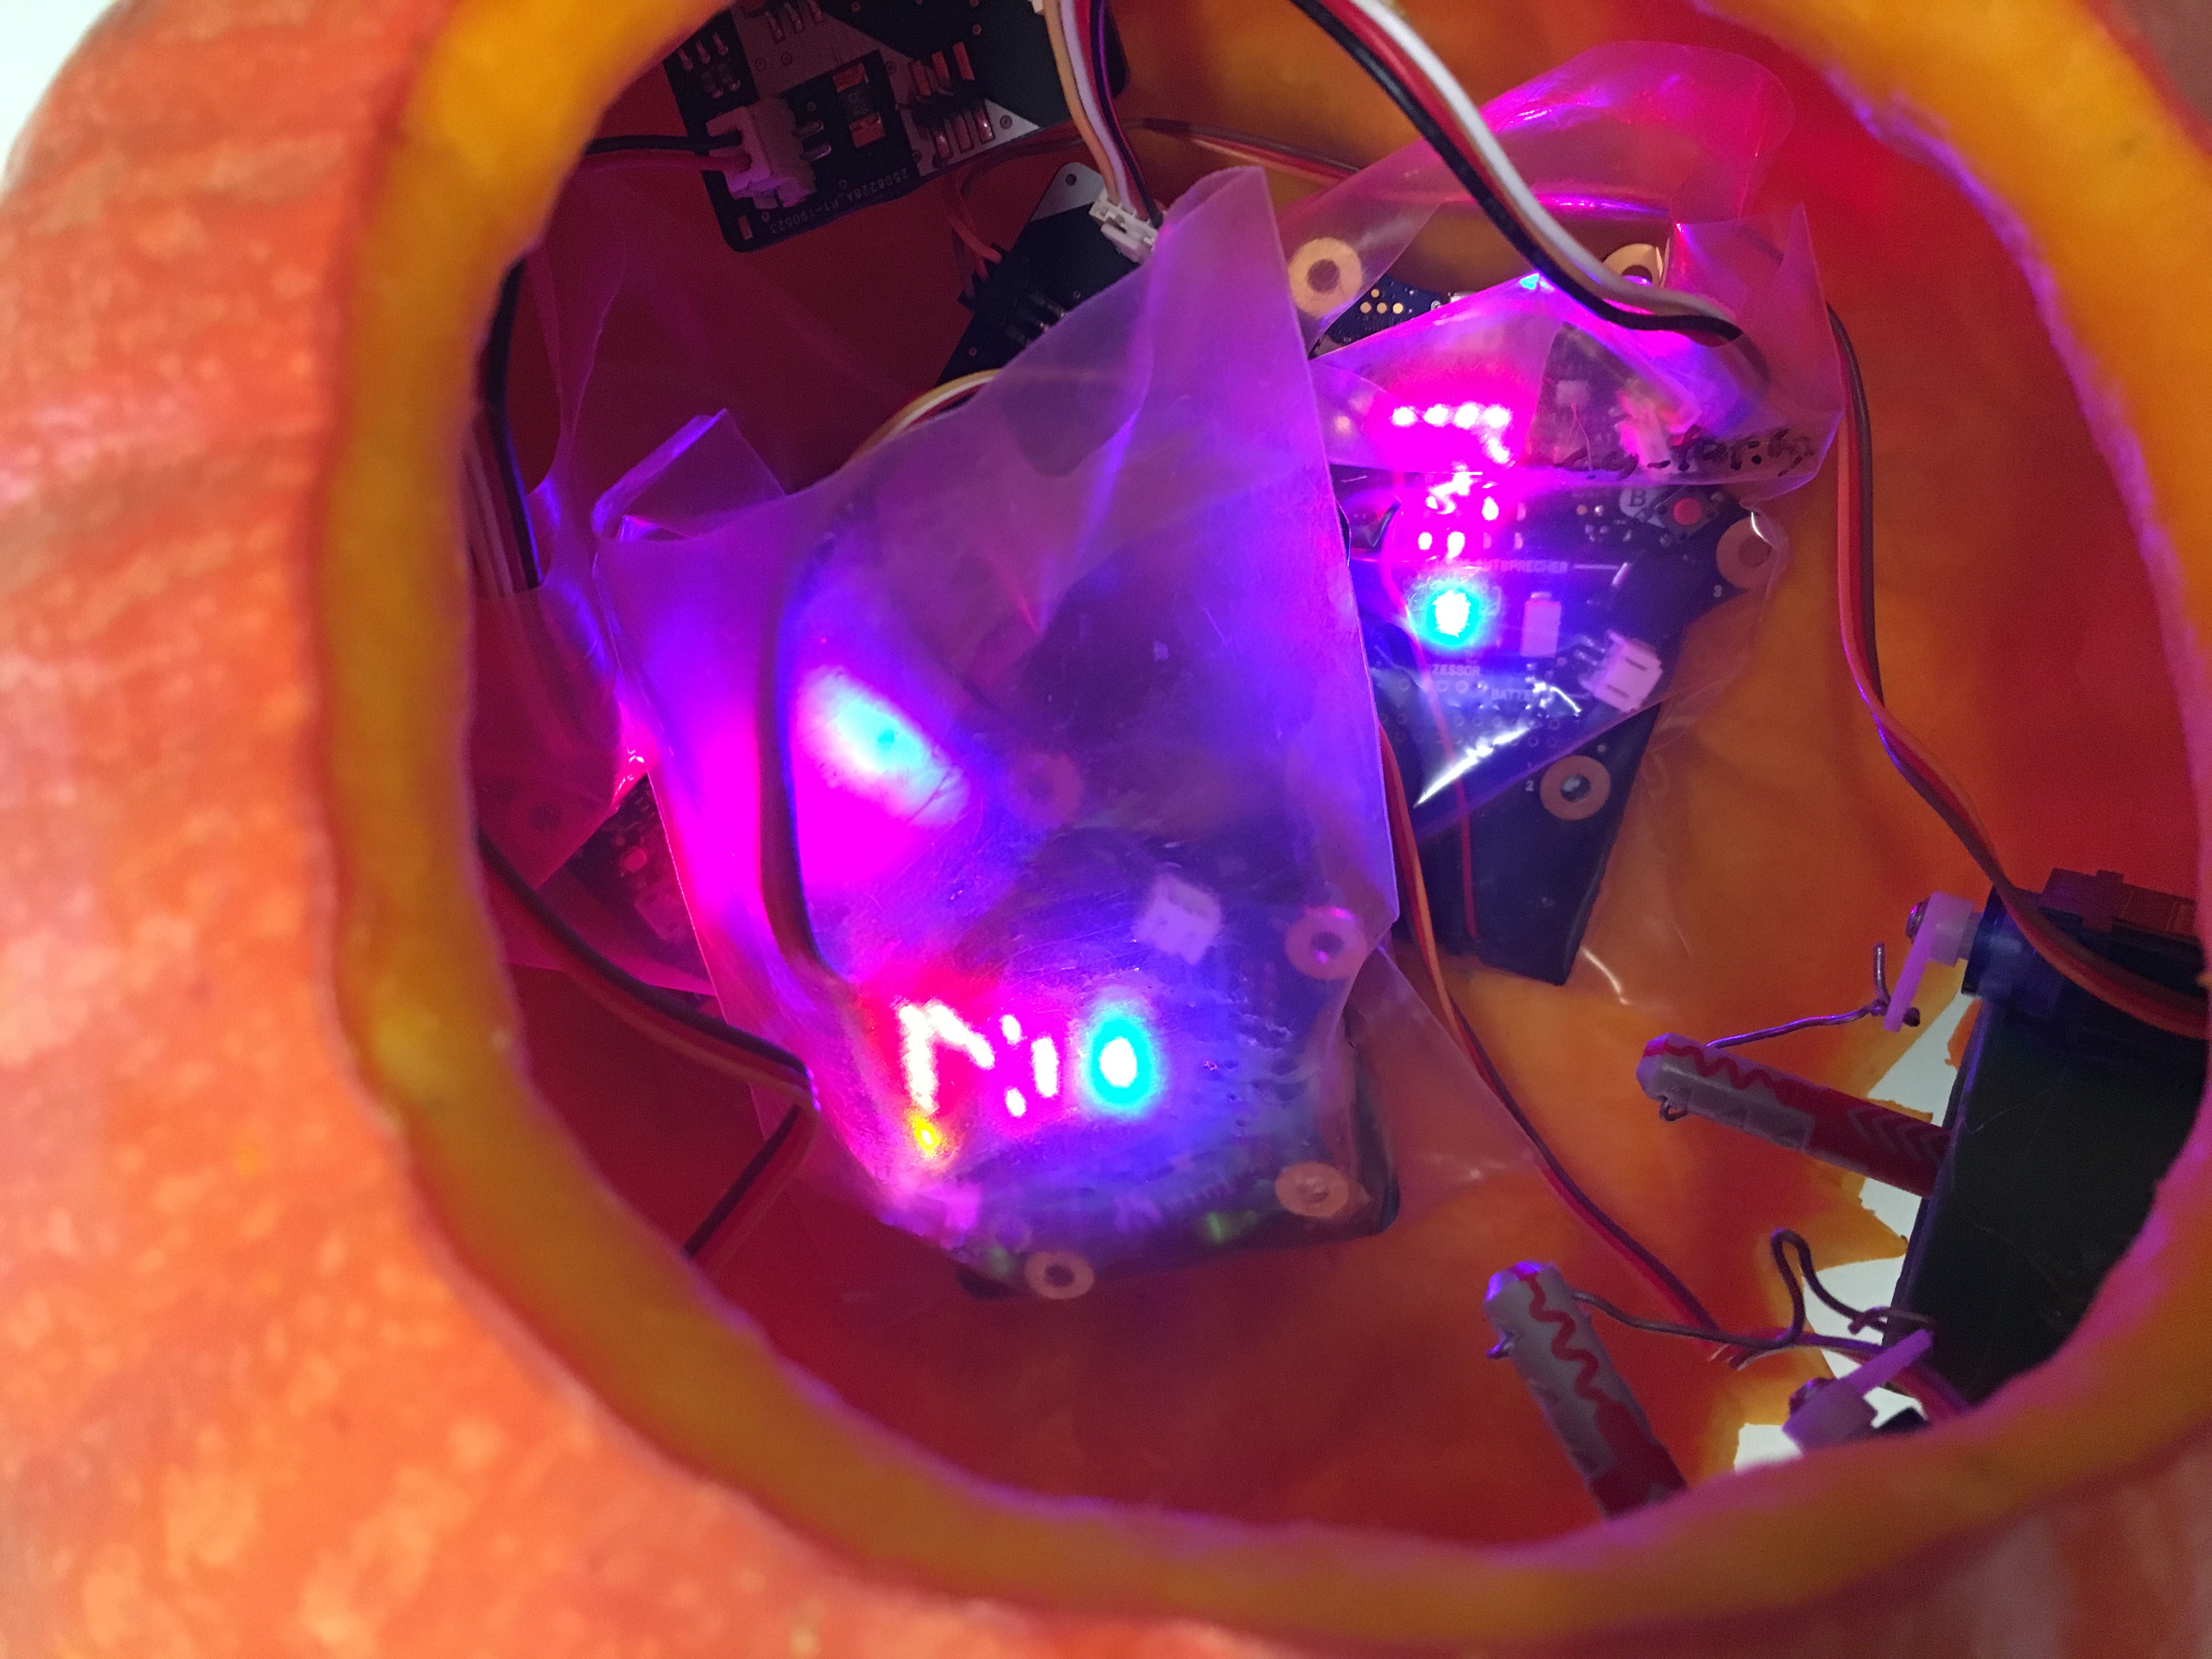
To protect the technique you should keep the minis and the boards in plastic bags in the pumpkin.
From the remaining pumpkin meat you can cook a delicious pumpkin soup! If you like, decorate the pumpkin with a creepy mouth and give it a nose.
This project follows the instructions of Markus Haack on hackster.io. The code and the technical accessories are adapted to the Calliope mini.