The project in this article is about more than just software - we'll build our own hardware from felt, foam rubber and copper tape. So get your scissors and sewing needle ready. But before we do the manual work, we have to compile the code.
Let's use the Open Roberta Lab (https://lab.open-roberta.org) for the programming of the microcontroller. Our program should make sure that the LED display of the Calliope plays an animation when our gym bag is moved. In addition, more animations will run when you press the buttons you made yourself. For the code you need the expert mode of the programming environment. First select the register with the star and the two in the upper left corner.

Creating the animation
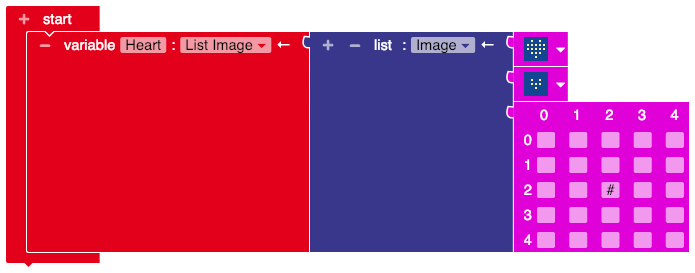
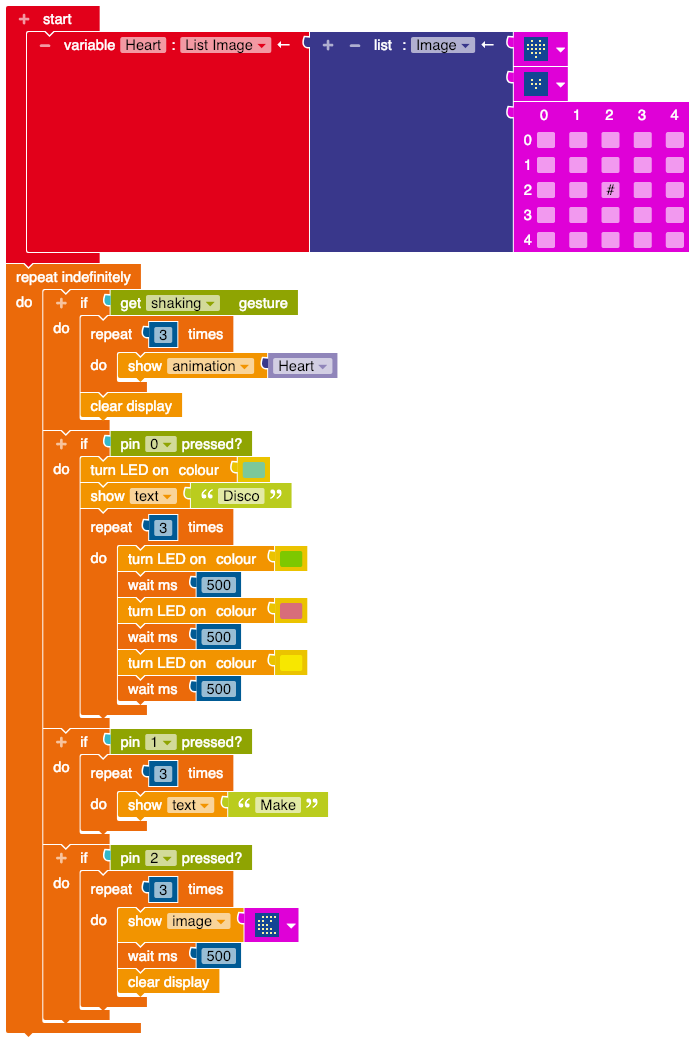
The Calliope mini should show a pulsating heart when the bag is moved during transport. In order to do so, we first need a list of images to be animated. To create this list, we first create a variable. Click on the "+" sign in the start block. In the appearing field you have to do two things. First you give your variable a name - where "Element" is at the beginning you enter "Heart". Then select the option "List image" in the selection field behind the name. This will change the component attached at the end. It is now dark blue with three pink image components attached. In all three you will see a heart at the beginning. But an animation is a sequence of different images. You change the images in this list so that it looks as if the heart is getting smaller. You can see exactly what you have to choose in the screenshot. You can get the last picture by deleting the default graphic and inserting the component for creating your own graphics from the "Images" block. Then mark the middle field. This turns the heart into a point.
Connecting the animation with the position sensor
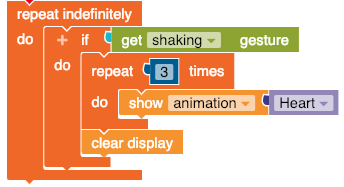
To display the animation when your gym bag is moved, you need to activate the Calliope's position sensor. To do so, add an infinite repetition (block "Control", area "Loops") and a condition (block "Control", area "Conditions"), which connects the feedback of the position sensor with the image list. To the "if ..." of the condition you append the component "get ... gesture" from the sensor block and select the setting "shaken" in the drop-down list. Under "make..." you insert the repetition "repeat ...times, do ...". In the block Action, area "Display" you can select and append the component "Show image ...". By clicking on the small triangle you change the component to "Show Animation". Throw away the rest of the image and add your variable Heart. After the condition insert the component "Clear Screen" (Block Action, Area Display). So that you have an empty screen after the animation.
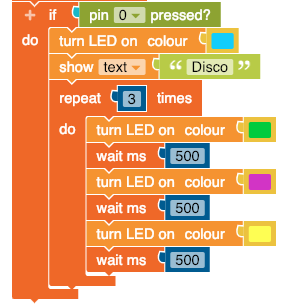
RGB-LED as disco light
The next command you need to program will make the RGB LED light up blue first and then scroll through the "Disco!" text on the display when pin 0 is pressed. For this we need another "if-do" condition from the block "Control" and from the block "Sensors" we need to check if pin 0 was pressed. The component "Switch LED on color ..." can be found in the block "Action", area "Status light". In the same block in the area "Display" is the component for creating the text "Disco"! Here you can also insert a condition for a certain number of repetitions and let the LED light up in different colors. It is important that you insert a short waiting time (block "Control") after each color command. Otherwise the colors merge into each other and are not distinguishable.
Programming additional pins
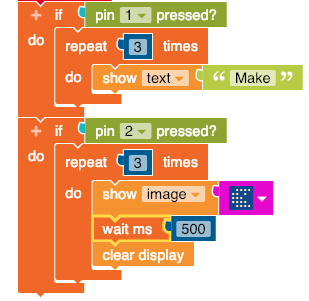
You can now program all or some of the other pins as well and display different texts or images. For each additional pin you need a "if-do" condition and a check if the pin has been pressed. This last section of your program might look like this. Download the program and try everything out to see if it works as you imagined it. Then you can start crafting the bag.
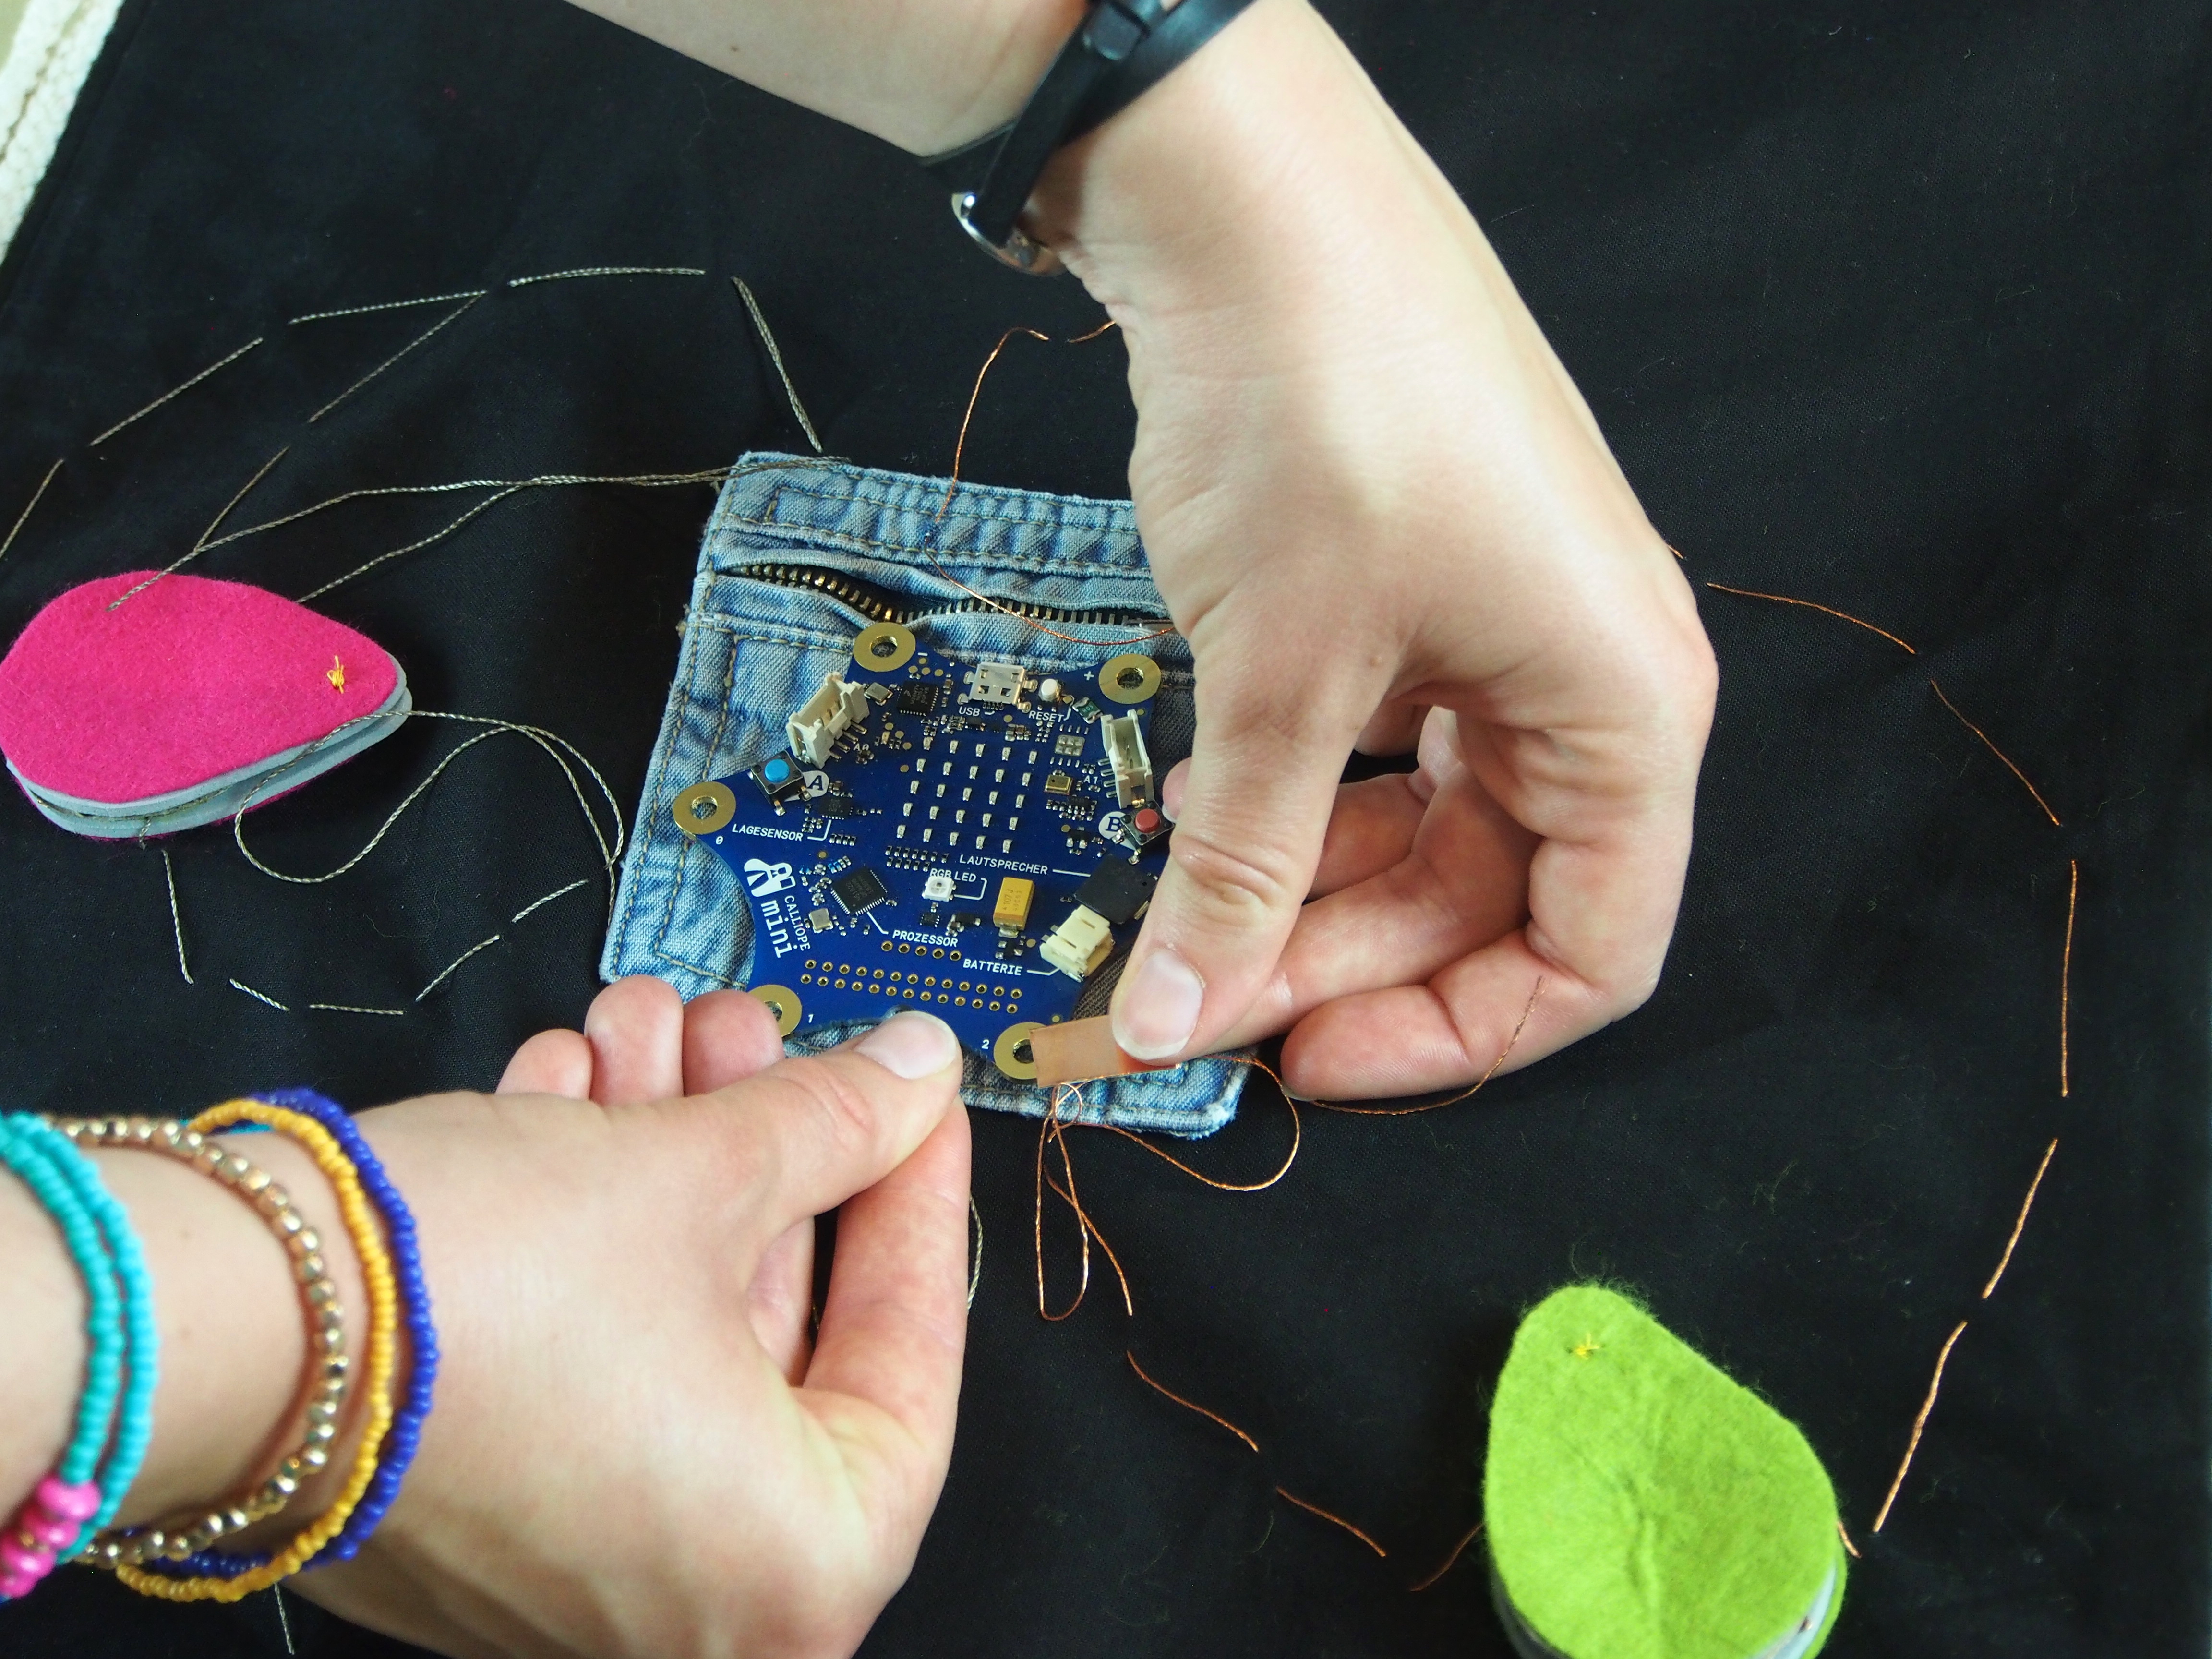
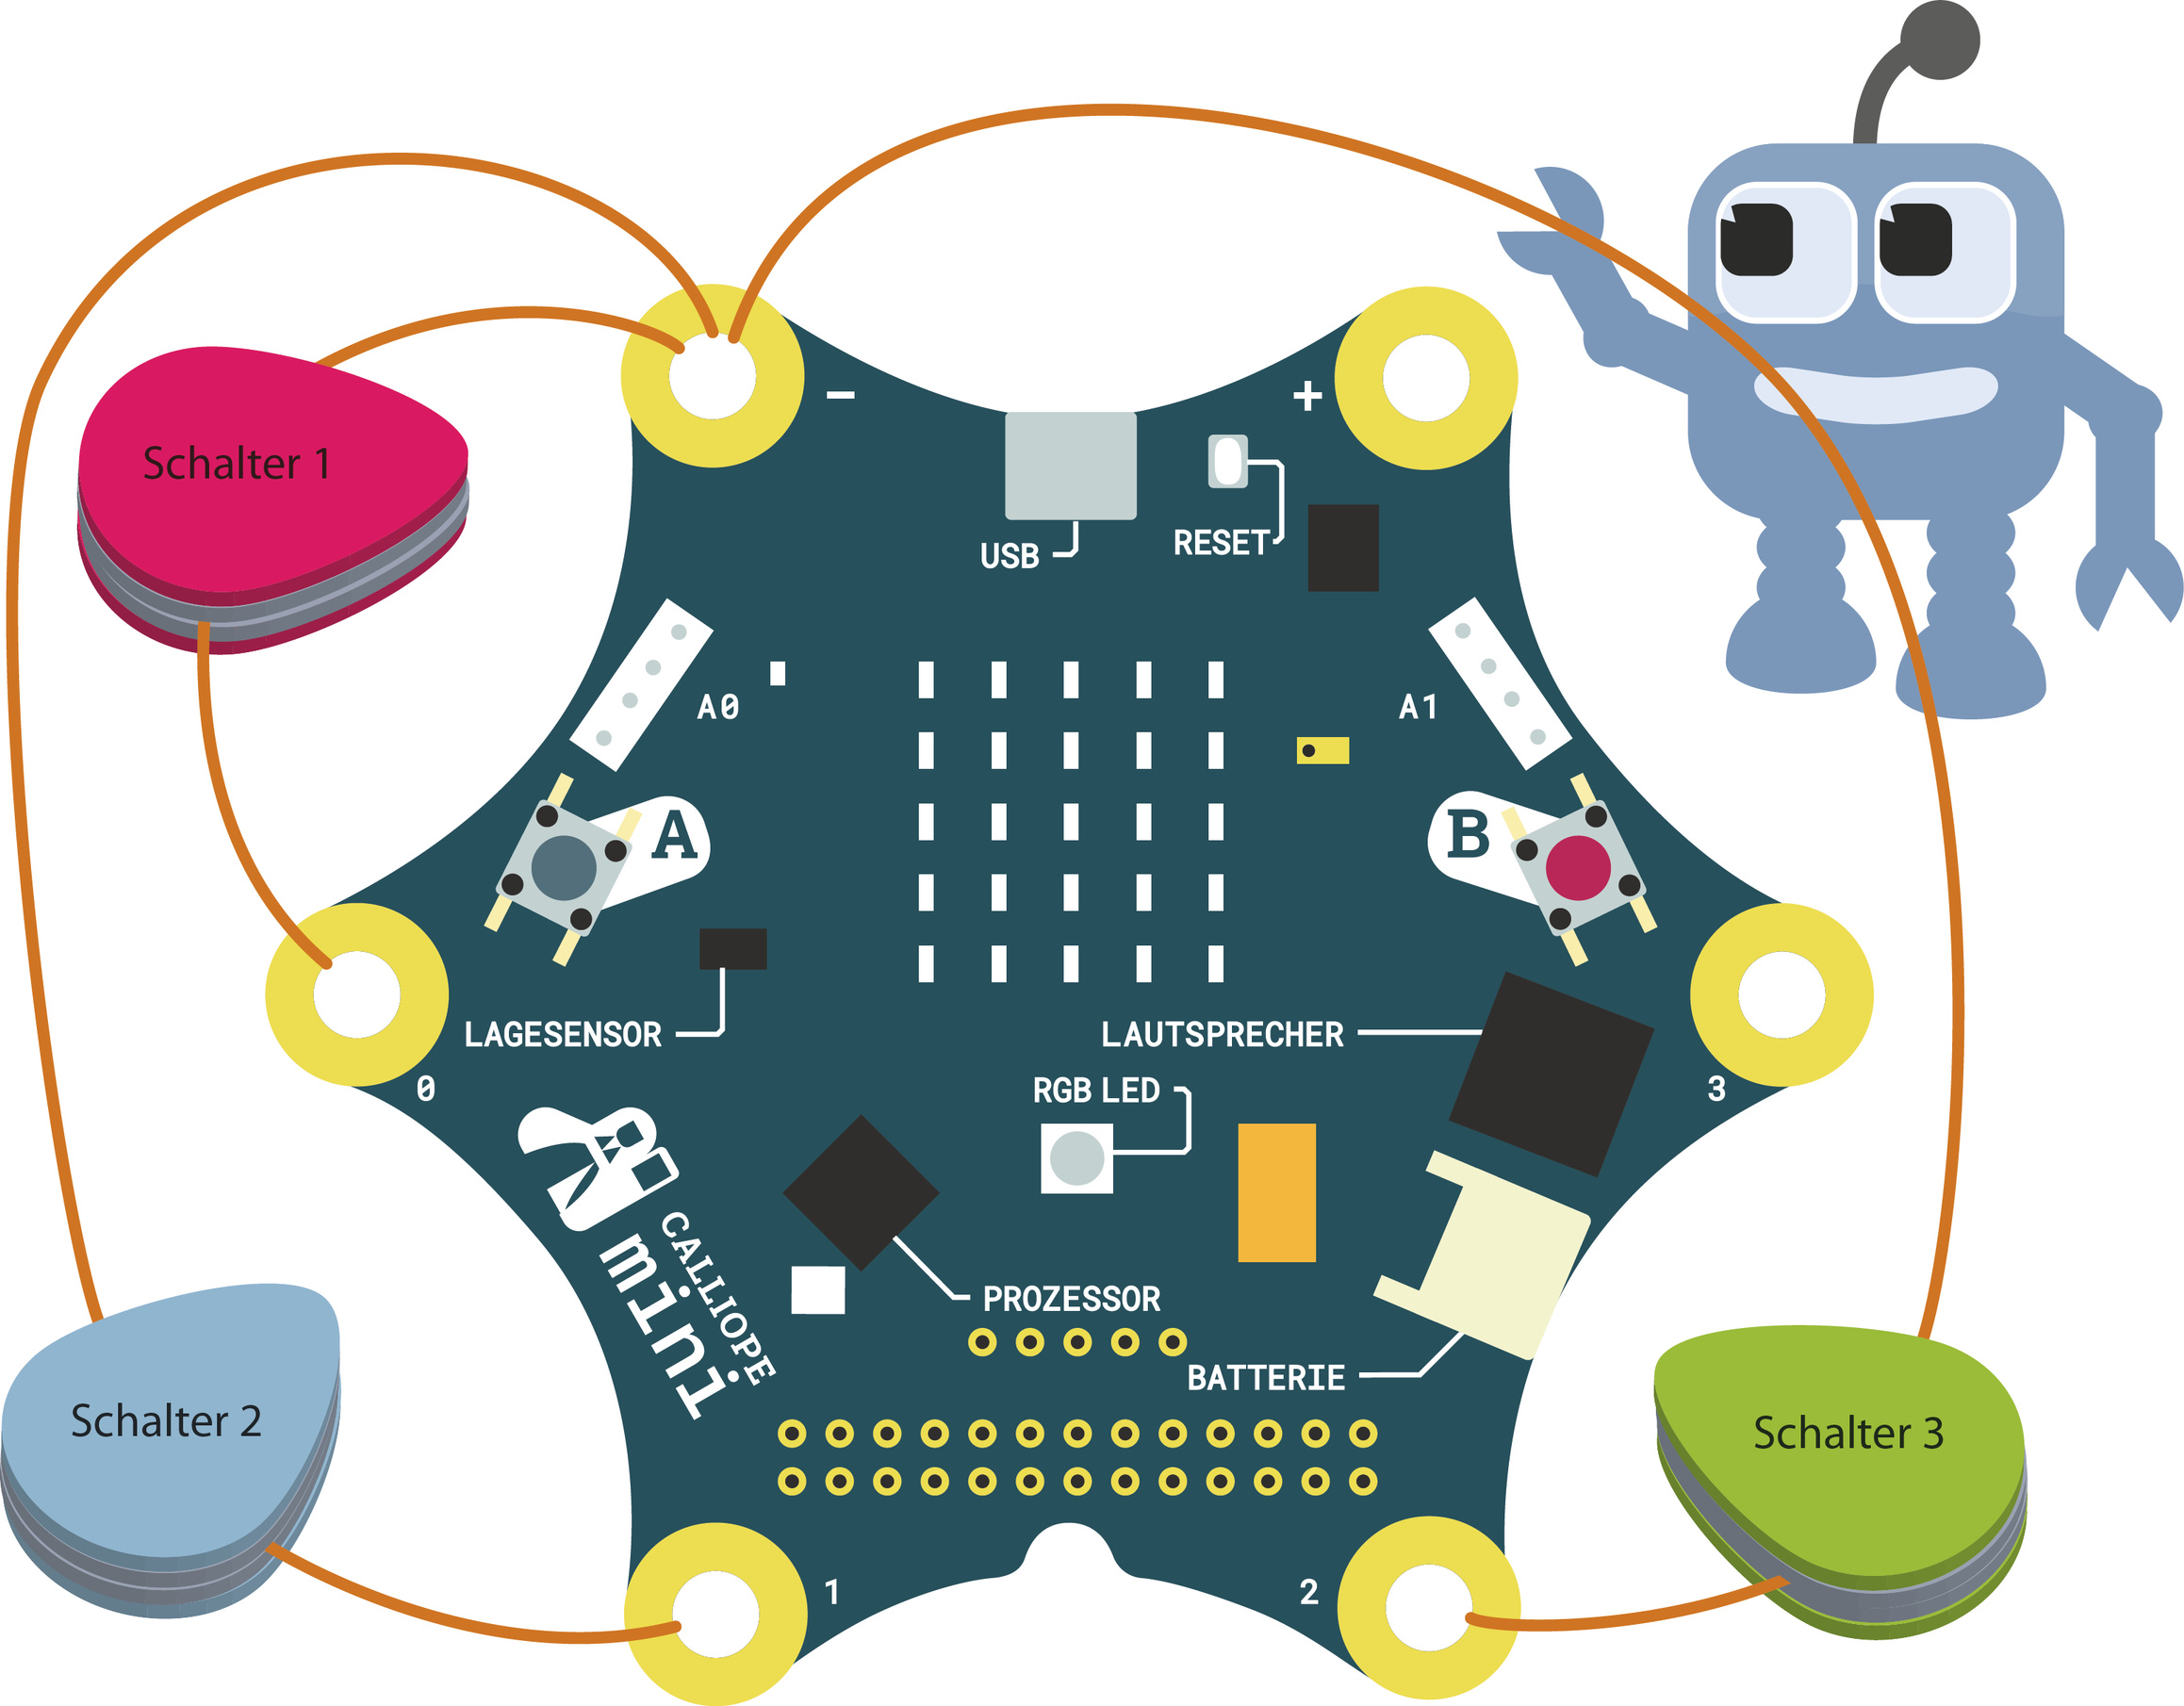
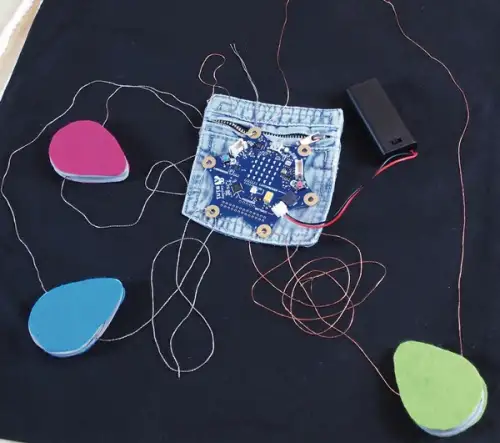
Before you start sewing properly, make a rough plan of where which elements on the bag should go and where the conductive threads should run so that the circuit to each pin the program checks is closed - without the threads touching along the way! First draw your plan on a large sheet of paper and then transfer it to the bag, for example with light chalk. For each switch, cut off enough long pieces of conductive yarn and place them in the right place on the bag. Leave the thread a little longer so that it will be easier to sew later. The buttons are used to connect the pin to the minus pole of the Calliope mini.
Textile switches
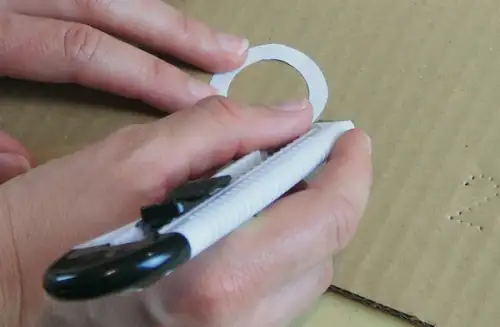
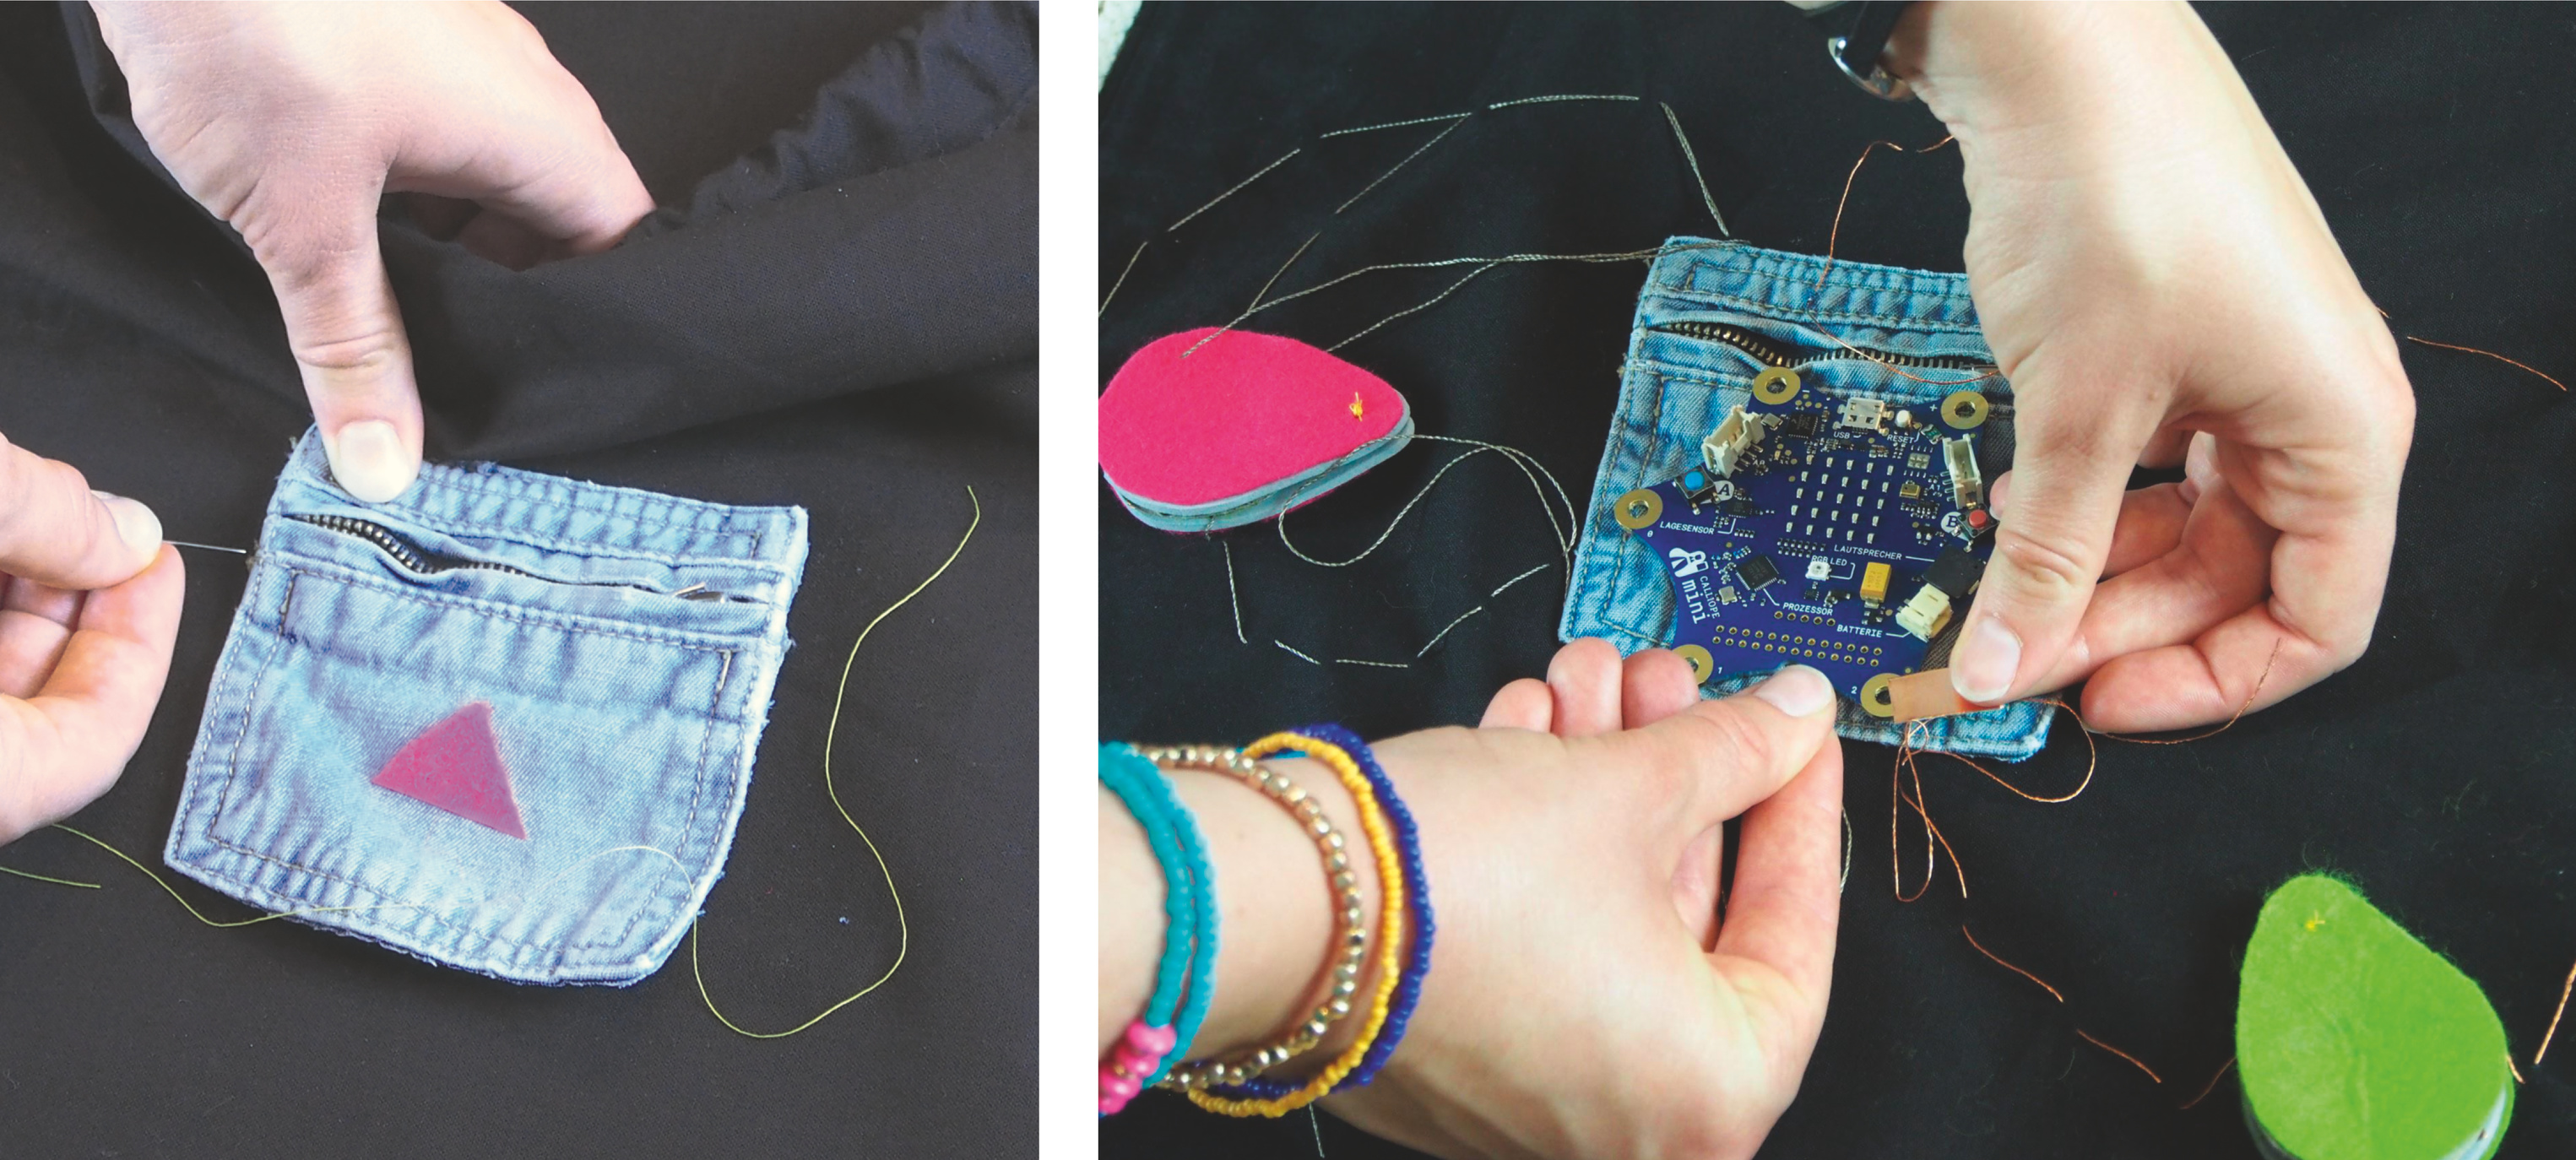
Cut the shape of your switches out of foam rubber and felt. You can cut a drop shape and large rings out of sturdy cardboard and use them as templates. For each switch you need the prepared yarn pieces, some copper tape, two foam rubber moulds, two felt moulds and two cardboard rings.
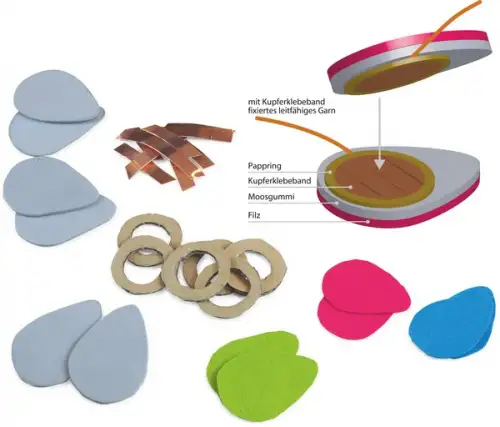
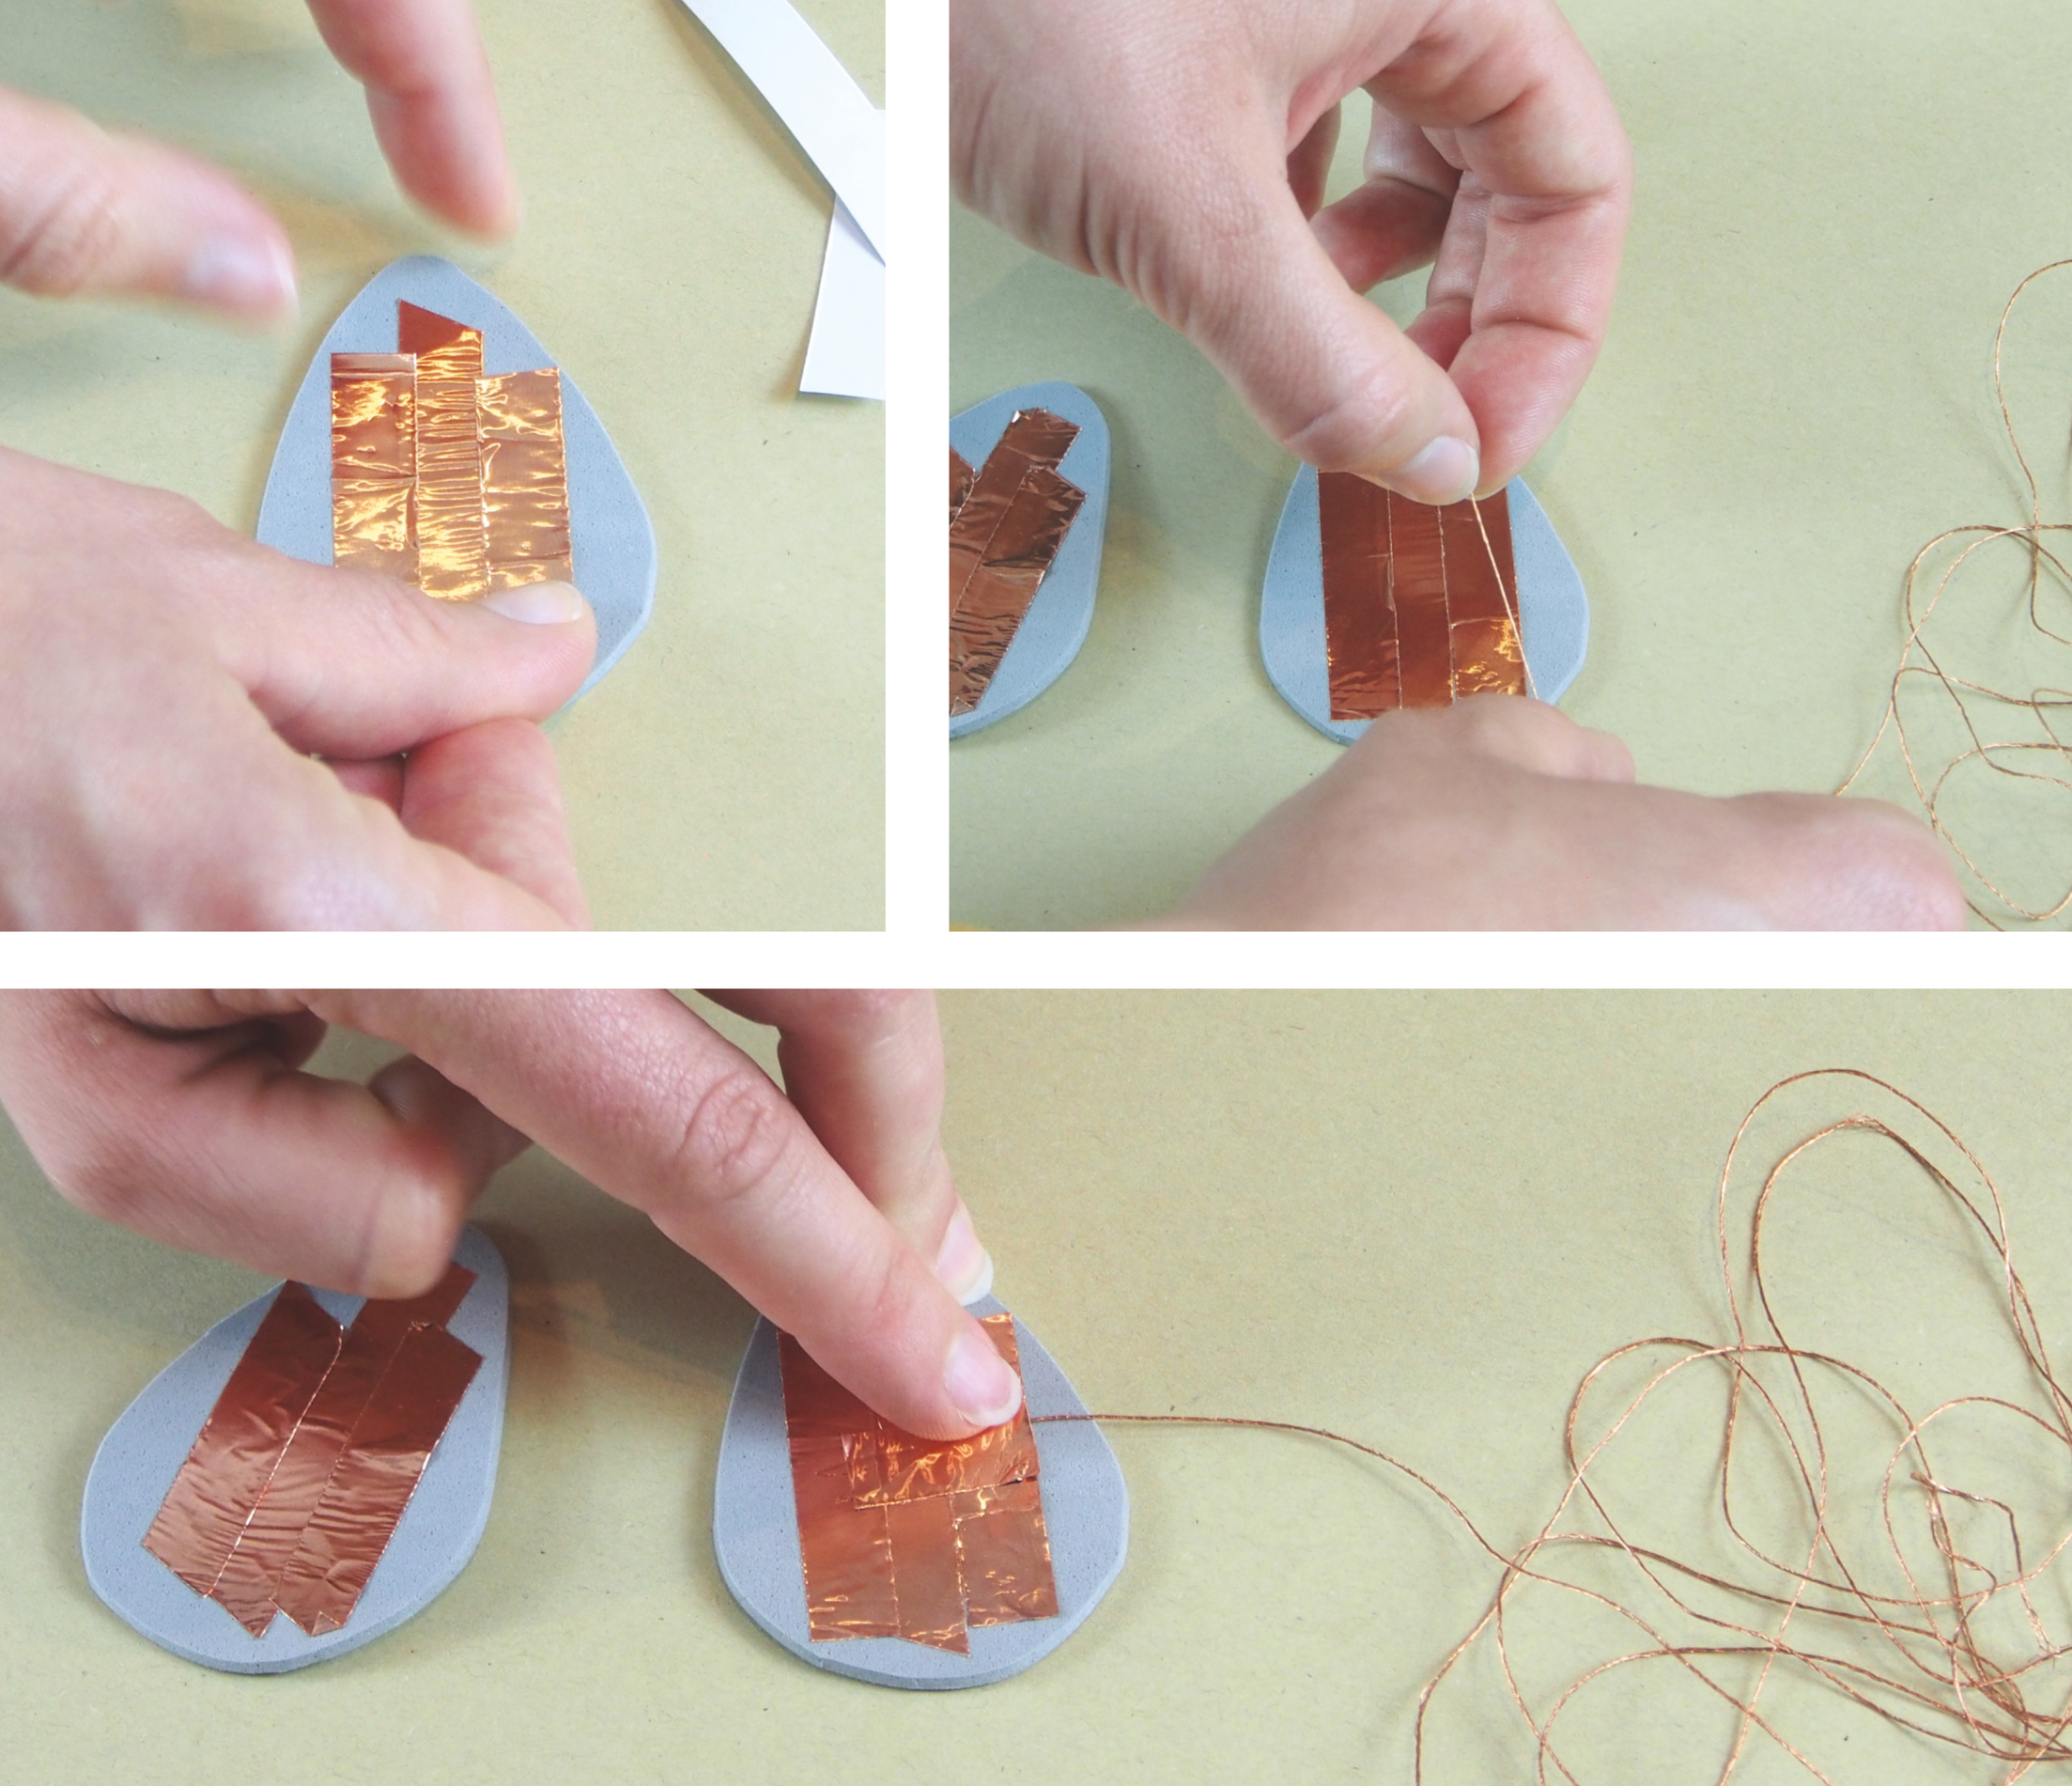
Making the textile switches conductive
Now stick a small area of conductive copper tape onto the foam rubber. Since the self-adhesive underside of the copper tape usually does not conduct electricity, you should make sure that all copper pieces with the glossy side touch at least one other copper tape, for example by bending their ends downwards and sticking them slightly offset on top of each other. Attach the conductive yarn to the edge of the copper surface with copper tape so that it is closely connected to the conductive, shiny copper surface. Make sure that the copper tape is only in the middle of the foam rubber and not at the edge where you will sew the textile switch to the pocket.
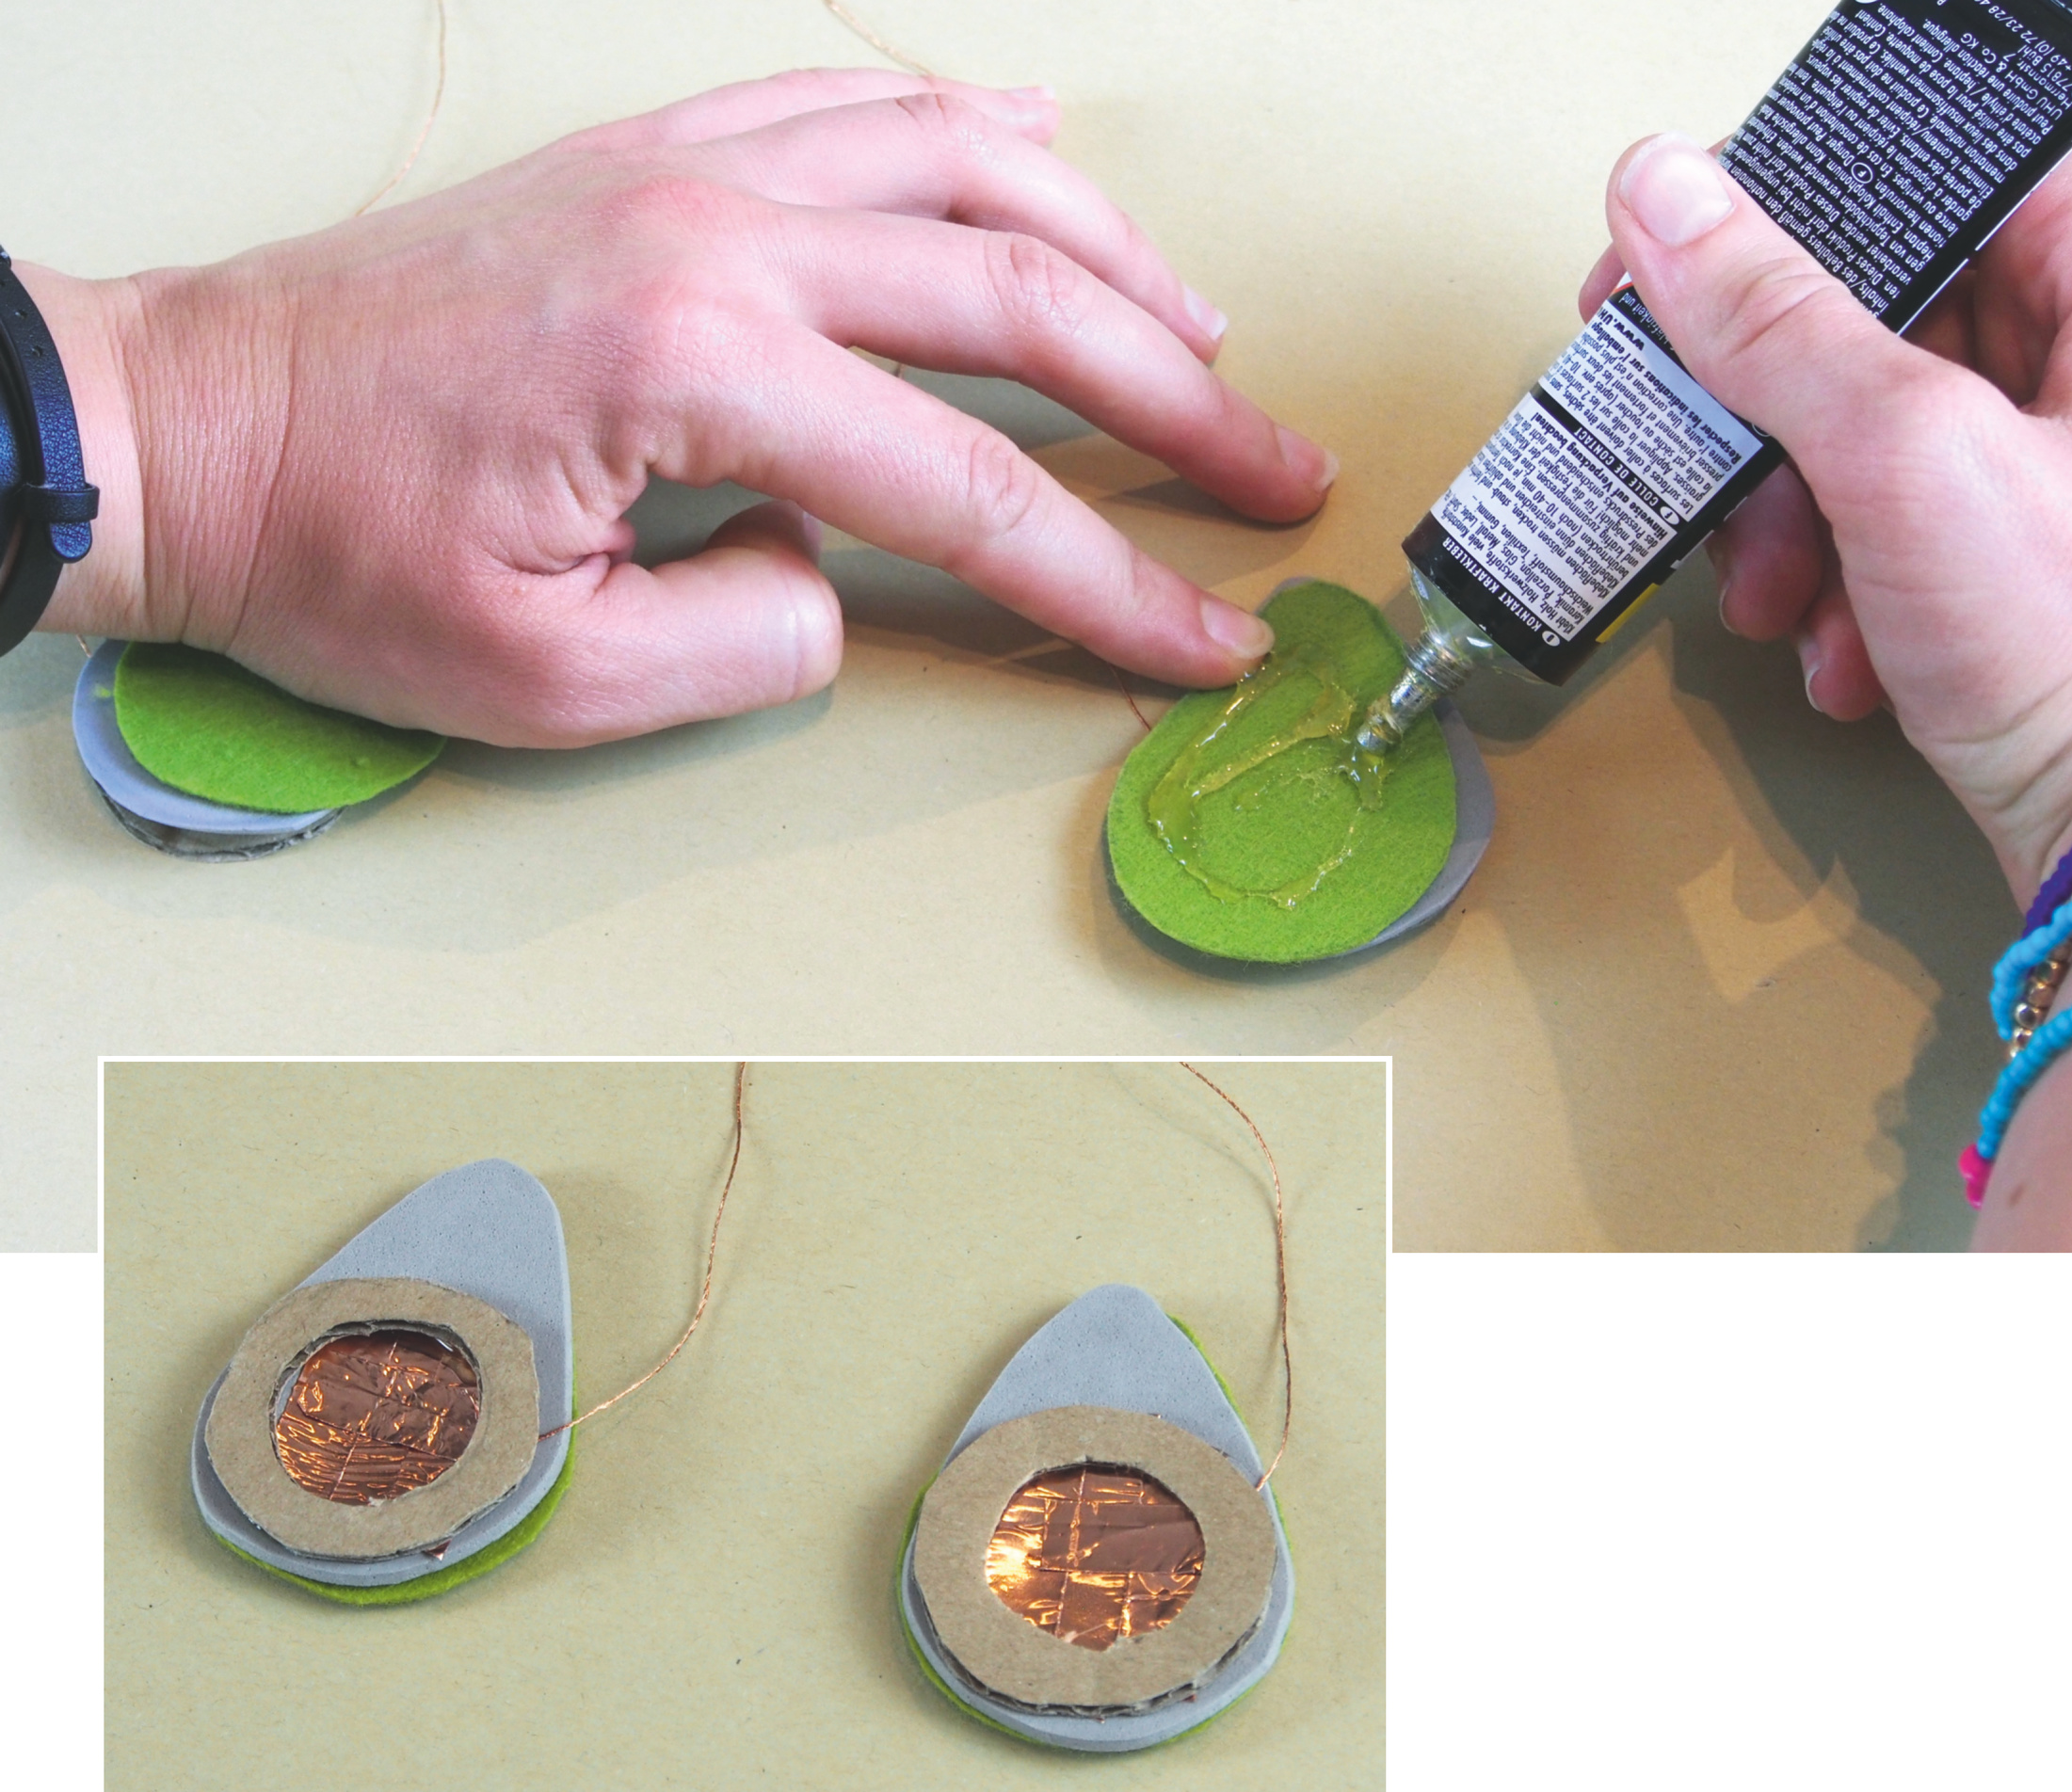
Assembling the textile switches
Now glue the ring-shaped pieces of cardboard as a frame around the copper surface. Stick the prepared felt moulds onto the backs of the foam rubber. Then coat the cardboard rings with glue and place two felt foam rubber cardboard halves on top of each other. Now a conductive thread should start from the top and bottom of your switches. Make sure that the conductive threads go in different directions and do not touch each other, otherwise your switch will not work.
Fixating the Calliope mini on the pocket
Now stick one half of a self-adhesive velcro fastener onto the back of the Calliope mini. Attach the other half to a jeans bag. We have separated our bag from a pair of trousers that no longer fits. You should sew the velcro tape on the trouser pocket a little so that it holds better on the fabric. Thanks to the Velcro, it's easier to remove the mini from the bag and reattach it later.
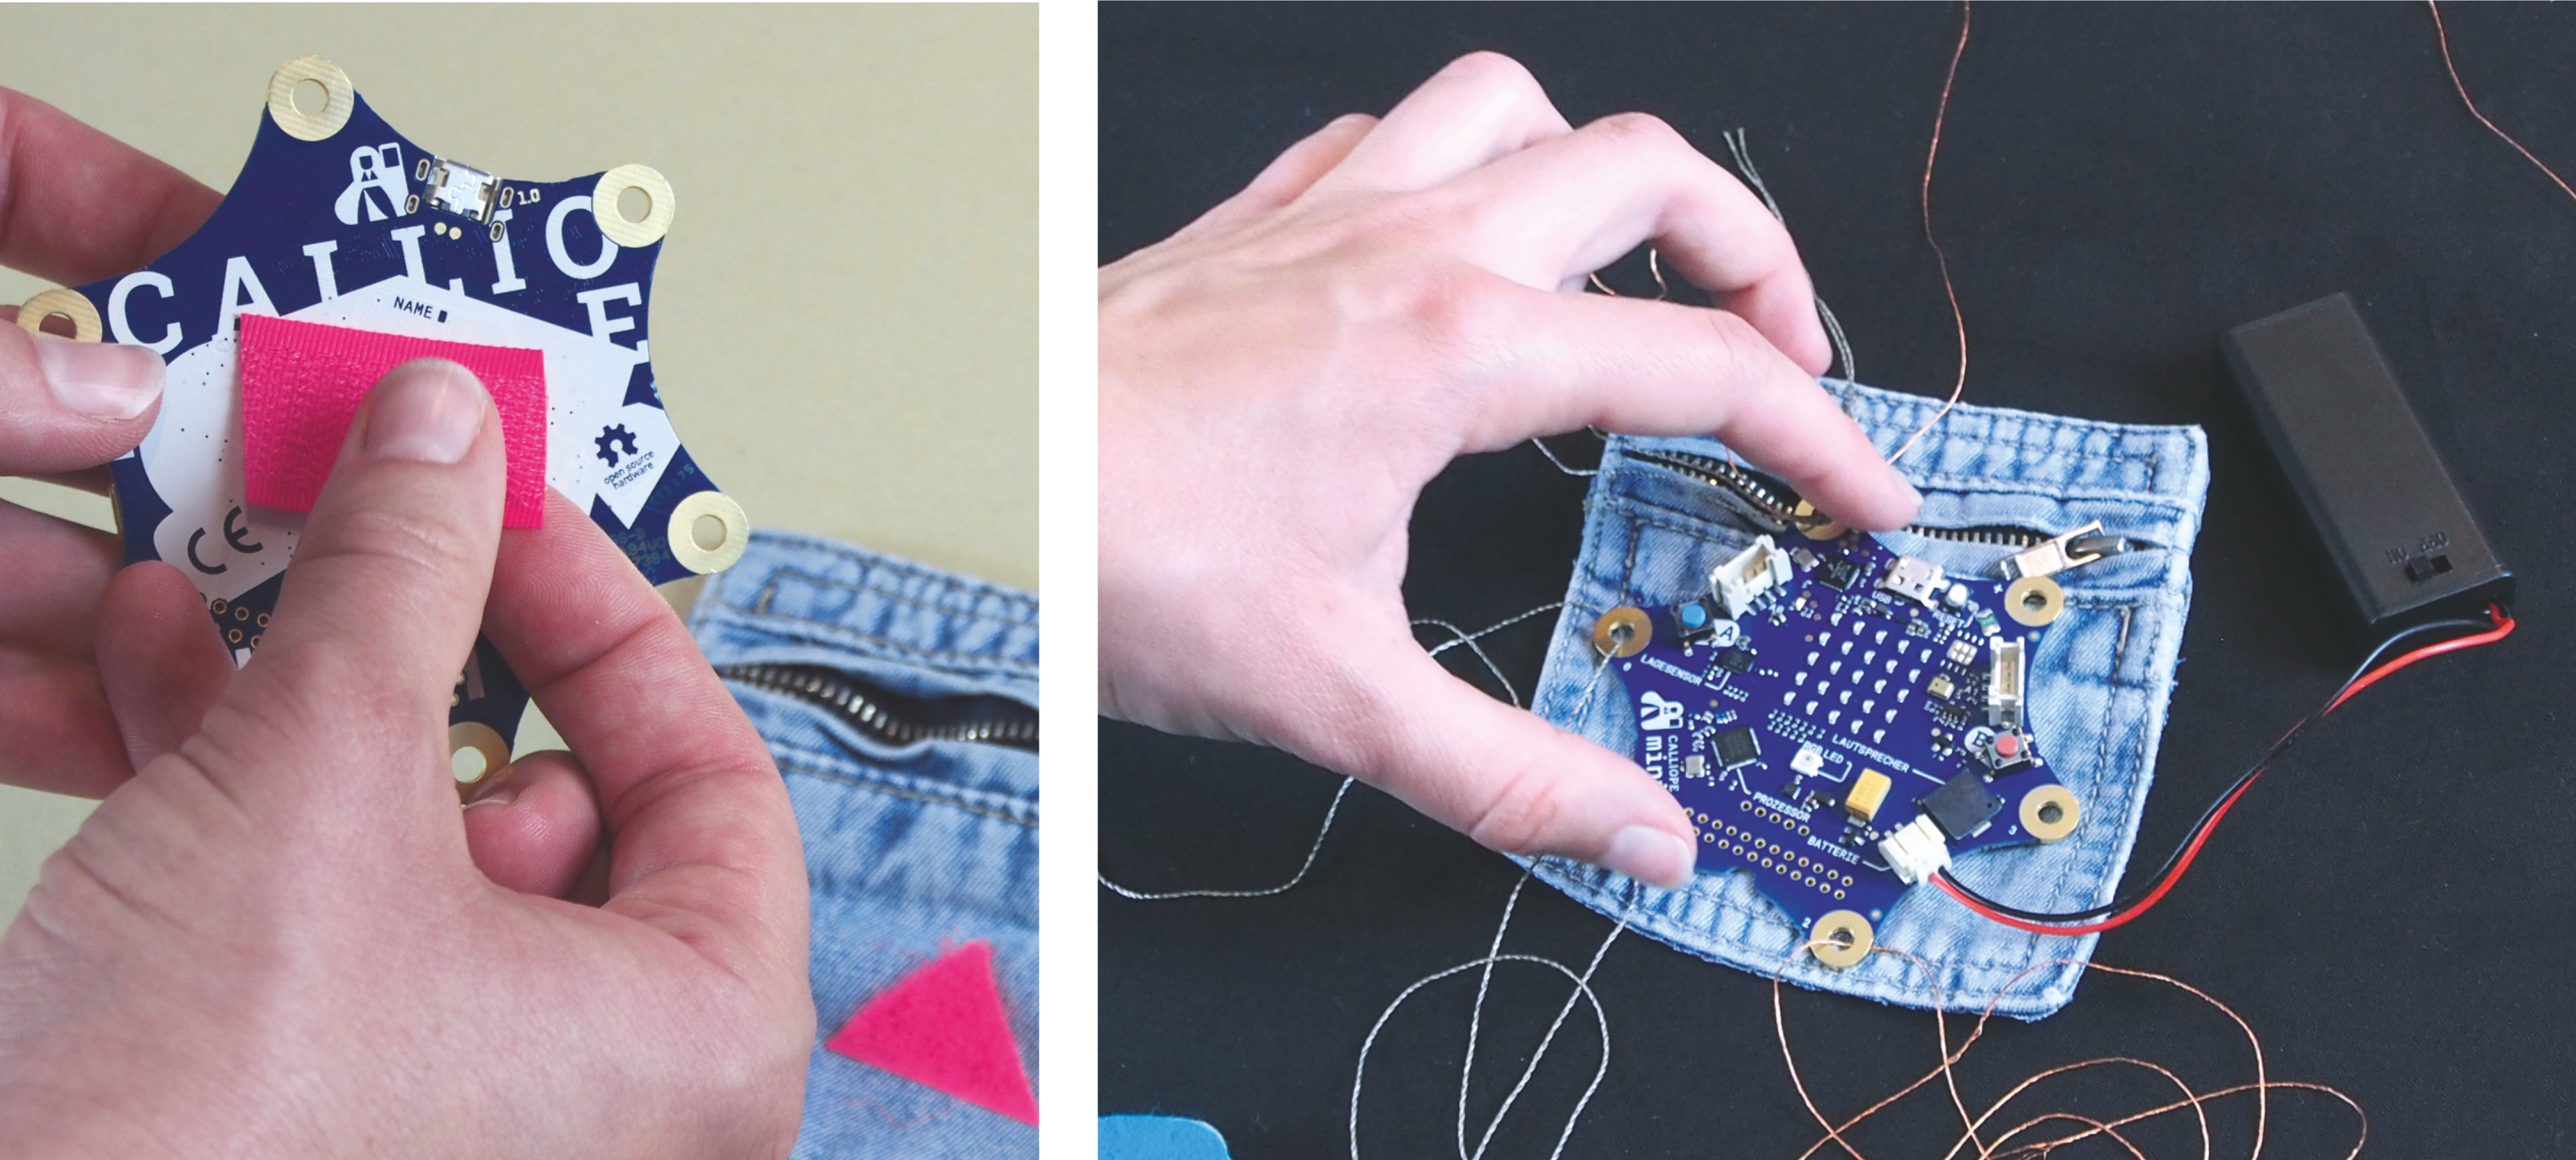
Connecting the Calliope with the switches
Now arrange the jeans bag with the Calliope mini and the switches on the bag as planned. First try to see if the yarn and switches actually work. Loosely connect one thread of the switch to the minus pole and the other thread of the switch to the correct pin.
Fixating the pocket and the switches
When everything is working and running smoothly, it's best to start by sewing the jeans pocket in place and then sewing the switches to their intended positions. For easy sewing you have to use normal, non-conductive thread! Then you can sew the conductive threads one after the another to the corresponding pins. Lead the thread ends of this thread around the pins several times and fix them with some copper tape. If you tie a knot, it will be more difficult to undo the mini later if you have to wash the bag once. And the copper pins also look nice! Tip: As with all other circuits, make sure that the threads from the different pins do not touch each other!
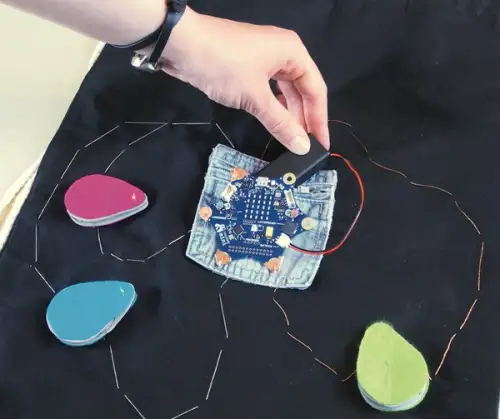
Connecting the battery holder
The last step is to connect the battery holder and hide it in the jeans pocket. Now the bag is ready, have fun with it!
This text is published under a CC BY-NC 3.0 license. It was originally published in German by Make: and translated into English by the Calliope team.